")
Kitchen Respray Maintenance Guide for Lasting Results
Few things brighten a home like a newly resprayed kitchen, but keeping those crisp surfaces in perfect condition can feel challenging. For homeowners across England, protecting that fresh finish means more than a quick wipe down—it calls for thoughtful planning and expert care. Discover how routine maintenance and strategic cleaning can extend the lifespan of your resprayed kitchen, giving you lasting results and a space that truly shines.
Table of Contents
- Step 1: Prepare Your Kitchen For Routine Cleaning
- Step 2: Clean Surfaces With Recommended Products
- Step 3: Protect Finishes From Daily Wear And Tear
- Step 4: Inspect And Address Common Issues
- Step 5: Verify And Maintain Your Resprayed Finish
Quick Summary
| Key Point | Explanation |
|---|---|
| 1. Clear Workspace for Cleaning | Remove all items from surfaces to enable thorough cleaning and access to every area of your kitchen. |
| 2. Choose Gentle Cleaning Products | Select non-abrasive, soft cleaning solutions to protect painted surfaces and prolong their aesthetic. |
| 3. Regularly Inspect Surfaces | Conduct routine checks for damage to identify chips, scratches, or discolouration before they worsen. |
| 4. Implement Protective Measures | Use mats and padding under appliances to prevent wear and tear on your resprayed surfaces. |
| 5. Maintain a Cleaning Log and Photos | Document the condition of your kitchen regularly to track changes and ensure proactive maintenance. |
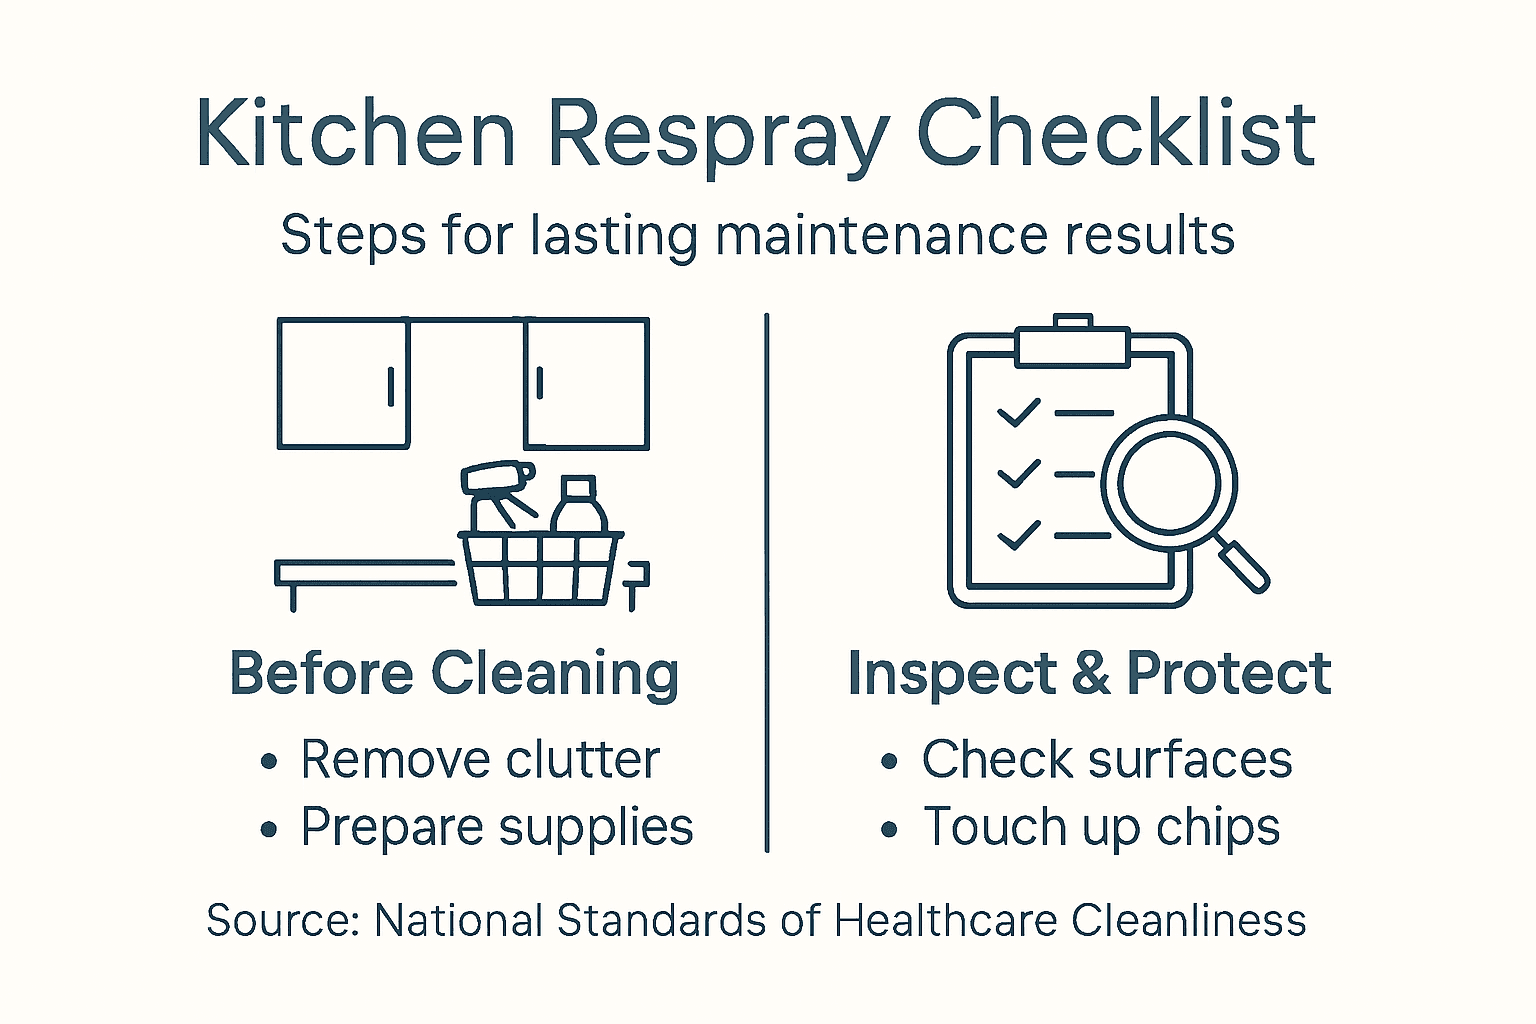
Step 1: Prepare your kitchen for routine cleaning
Ensuring your kitchen is primed for thorough cleaning requires strategic preparation. By following a systematic approach, you’ll create an environment that enables efficient and effective maintenance, protecting your recently resprayed kitchen surfaces.
To begin, you’ll want to clear and organise your kitchen workspace. This involves several key actions:
- Remove all items from countertops and working surfaces
- Place small appliances and utensils in designated storage areas
- Clear food debris using soft cloths or disposable wipes
- Ensure good ventilation by opening windows or kitchen doors
The National Standards of Healthcare Cleanliness recommend removing clutter to facilitate more comprehensive cleaning. This principle applies equally to kitchen environments, allowing you to access every surface systematically.
Preparing cleaning supplies in advance is crucial. Gather your chosen cleaning agents, fresh microfibre cloths, and protective gloves. The Safer Food, Better Business guidance emphasises using approved detergents and changing cleaning solutions frequently to maintain hygiene standards.
Pro tip: Keep a dedicated cleaning caddy with all necessary supplies to streamline your routine and save time during kitchen maintenance.
Step 2: Clean surfaces with recommended products
Cleaning your recently resprayed kitchen surfaces requires a strategic approach that protects your investment while maintaining optimal hygiene. Selecting the right cleaning products and techniques will ensure your kitchen remains pristine and your respray finish stays beautiful for years to come.
Start by gathering the appropriate cleaning supplies. You’ll want to focus on gentle, non-abrasive products specifically suitable for painted surfaces:
- Microfibre cloths for dust and light debris removal
- Soft, non-scratch cleaning solutions
- Warm water with mild detergent
- Separate cloths for different kitchen zones
The Control of Substances Hazardous to Health guidelines recommend carefully selecting cleaning agents that effectively remove dirt while minimising potential risks. This means avoiding harsh chemicals that could damage your kitchen’s delicate respray finish.
When cleaning, use gentle circular motions and avoid excessive pressure. Rinse cloths frequently and change them between different surface areas to prevent cross-contamination. The NHS hygiene recommendations emphasise thorough cleaning and proper rinsing to remove chemical residues and maintain a safe kitchen environment.
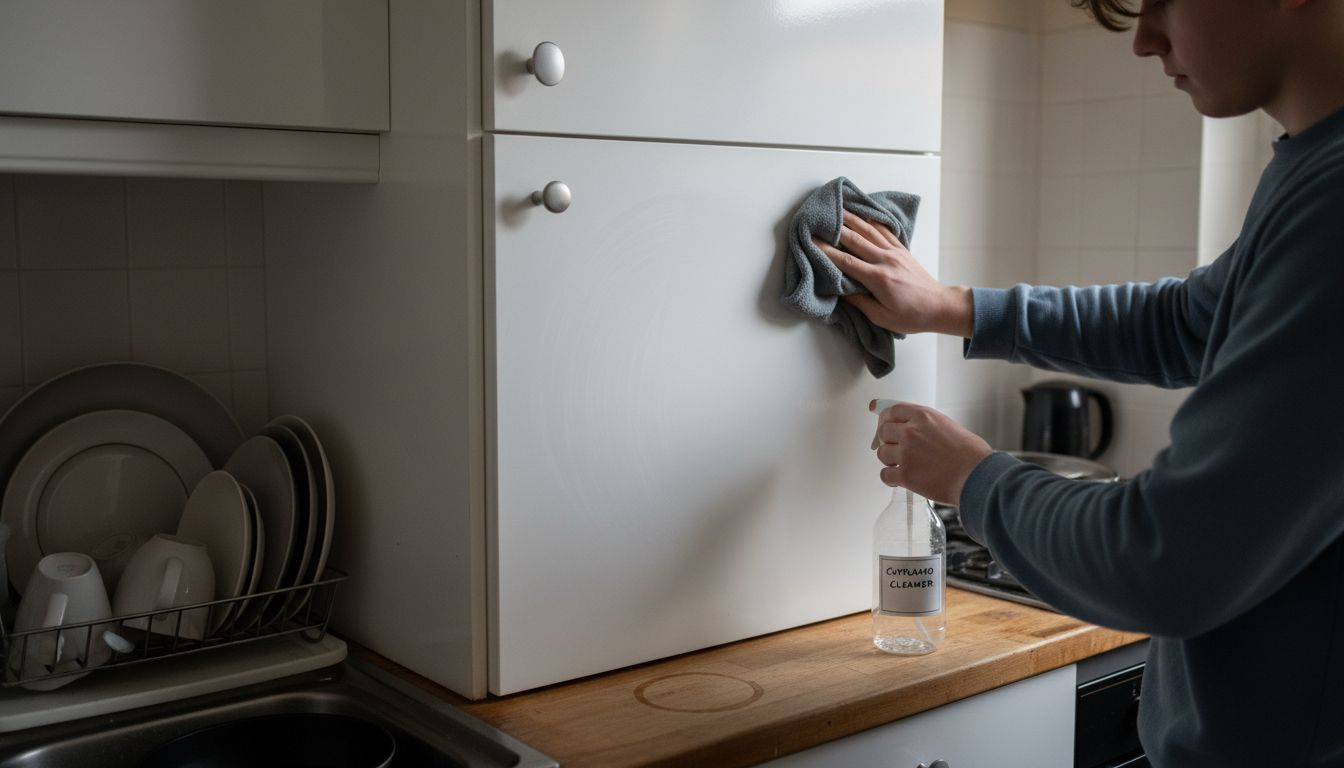
Pro tip: Always test new cleaning products on a small, inconspicuous area first to ensure they won’t damage your kitchen’s resprayed surfaces.
The following table compares cleaning tools suitable for newly resprayed kitchen finishes:
| Cleaning Tool | Compatibility with Resprayed Surfaces | Typical Use |
|---|---|---|
| Microfibre cloth | Highly compatible | Wiping, dusting and gentle cleaning |
| Soft sponge | Safe if non-abrasive | General cleaning of painted areas |
| Abrasive pad | Not recommended | Likely to scratch or damage the finish |
| Traditional cotton cloth | Acceptable if clean and soft | Light wiping but less effective at trapping dirt |
Step 3: Protect finishes from daily wear and tear
Your recently resprayed kitchen surfaces represent a significant investment that requires thoughtful protection. Understanding how to minimise daily damage will help maintain the pristine appearance and longevity of your kitchen’s finish.
Implement these strategic protective measures to preserve your surfaces:
- Use protective mats under frequently used appliances
- Avoid dragging heavy items across painted surfaces
- Install soft-close mechanisms on cupboards and drawers
- Place felt pads underneath ceramics and metal objects
- Quickly wipe up spills to prevent potential staining
The Historic England maintenance guidance emphasises conducting regular inspections to address minor damages early, preventing more significant deterioration of surface finishes.
Be particularly mindful of high-traffic areas and potential impact zones. Soft barriers and careful handling can dramatically reduce unnecessary friction and potential scratching. Consider using decorative trays or protective runners in areas prone to frequent contact or movement.
Routine maintenance prevents premature surface deterioration and preserves your kitchen’s aesthetic appeal.
Pro tip: Invest in microfibre cloths with soft edges and avoid abrasive cleaning tools that might inadvertently damage your carefully maintained kitchen surfaces.
Step 4: Inspect and address common issues
Regular inspection of your resprayed kitchen surfaces is crucial for maintaining their pristine appearance and catching potential problems before they escalate. By developing a systematic approach to monitoring your kitchen’s condition, you can prevent minor issues from becoming costly repairs.
Focus your inspection on these critical areas:
- Check for tiny chips or scratches around handles and edges
- Examine high-traffic zones for signs of wear
- Look for any discolouration or uneven patches
- Inspect seams and joints between cabinet surfaces
- Monitor areas near heat sources and sinks for potential damage
The Historic England maintenance guidance recommends conducting thorough inspections to identify potential defects early and prevent more extensive damage.
Early intervention is key when addressing surface imperfections. Small touch-ups can often be completed quickly and economically, preventing more significant restoration work. Consider keeping a small touch-up kit specifically matched to your kitchen’s respray colour for immediate minor repairs.
Here is a summary of common problems for resprayed kitchen surfaces and how early intervention resolves them:
| Surface Issue | Likely Cause | Consequence if Ignored | Benefit of Early Action |
|---|---|---|---|
| Small chips or scratches | Repeated handling or impact | Visible surface deterioration | Quick touch-up restores finish |
| Discolouration | Exposure to heat or moisture | Permanent staining possible | Immediate cleaning prevents marks |
| Peeling at seams | Moisture ingress | Surface layer loosens or lifts | Resealing preserves integrity |
| Texture changes | Use of harsh chemicals | Uneven or roughened surface | Mild cleaning products avoid damage |
Consistent, careful monitoring prevents premature surface deterioration and maintains your kitchen’s aesthetic quality.
Pro tip: Create a quarterly inspection checklist and set calendar reminders to ensure you never miss an opportunity to catch and address potential surface issues.
Step 5: Verify and maintain your resprayed finish
Maintaining the pristine quality of your kitchen’s resprayed surfaces requires a systematic and attentive approach. By understanding how to verify and preserve your finish, you’ll ensure your investment remains beautiful and functional for years to come.
Establish a comprehensive maintenance routine that includes these critical verification steps:
- Conduct monthly visual inspections
- Check for colour consistency across surfaces
- Test cleaning product compatibility
- Assess surface smoothness and integrity
- Document any changes or potential issues
The Control of Substances Hazardous to Health guidelines emphasise the importance of using compatible cleaning products that maintain both surface quality and safety standards.
Detailed verification involves more than just a casual glance. Use adequate lighting to examine surfaces from multiple angles, looking for subtle changes in texture, colour, or sheen. Consider keeping a detailed maintenance log to track your kitchen’s condition over time, which can help identify potential issues before they become significant problems.
Consistent, careful verification protects your kitchen’s aesthetic and functional quality.
Pro tip: Photograph your kitchen’s surfaces during each inspection to create a visual record that helps you track subtle changes in your resprayed finish.
Protect Your Investment with Expert Kitchen Respray Services
Maintaining your kitchen’s resprayed surfaces can be challenging but crucial for preserving their flawless look and durability. This guide highlights common issues such as small chips, wear in high-traffic zones, and damage from harsh cleaning agents. If you want to avoid costly repairs and keep your kitchen looking pristine, professional help can make all the difference. Our experienced team specialises in in-situ kitchen resprays that restore and protect surfaces with expert precision

Discover how we can extend the life of your respray finish with tailored maintenance advice and premium respray solutions. Visit our Uncategorized Archives to learn more about caring for your kitchen surfaces and explore all our services. Take the next step towards a stunning, long-lasting kitchen by contacting us at SKR Specialists today. Don’t wait until minor wear becomes a major problem—protect your home now with trusted professionals.
Frequently Asked Questions
How can I prepare my kitchen for routine cleaning after a respray?
To prepare your kitchen for routine cleaning, remove all items from surfaces, organise appliances, and ensure good ventilation. Start by clearing debris with soft cloths and set up your cleaning supplies, including gentle detergents and microfibre cloths.
What cleaning products are safe for resprayed kitchen surfaces?
Use gentle, non-abrasive cleaning products specifically designed for painted surfaces, such as warm water with mild detergent and soft cloths. Always test new cleaning products on a small, inconspicuous area before broad application to avoid potential damage.
How can I protect my resprayed kitchen finishes from wear and tear?
To protect your resprayed kitchen finishes, use protective mats under appliances, avoid dragging items across surfaces, and quickly wipe up any spills. Implement these measures consistently to significantly reduce the risk of scratches and damage over time.
What should I inspect for when checking my repainted kitchen surfaces?
When inspecting your repainted kitchen surfaces, look for tiny chips or scratches, discolouration, and wear in high-traffic areas. Regular checks can help you identify minor issues early, allowing for quick touch-ups that prevent costly repairs later.
How often should I verify the condition of my resprayed kitchen surfaces?
It’s advisable to conduct visual inspections of your resprayed kitchen surfaces monthly. Document any changes or issues you notice to ensure timely maintenance and to keep your kitchen looking pristine for years to come.
What should I do if I notice damage on my resprayed surfaces?
If you notice damage on your resprayed surfaces, such as small chips or scratches, address them quickly with a touch-up kit that matches your kitchen’s colour. Immediate minor repairs can prevent more significant restoration work and help maintain your kitchen’s visual appeal.