")
Kitchen Respray Troubleshooting Guide for Flawless Results
Every british homeowner dreams of a flawless kitchen makeover, but even a small mistake during respraying can ruin the overall look. With kitchens seeing an average of 200 hours of use each month, surfaces are more prone to grease, stains, and paint problems than you might expect. Knowing how to spot and fix common respray issues helps you avoid costly setbacks and achieve a professional finish that stands up to daily British life.
Table of Contents
- Etape 1: Assess Common Kitchen Respray Issues
- Etape 2: Prepare Surfaces For Effective Troubleshooting
- Etape 3: Correct Application Mistakes And Surface Defects
- Etape 4: Resolve Adhesion And Finish Inconsistencies
- Etape 5: Verify Results And Maintain Long-Lasting Quality
Quick Summary
| Key Point | Explanation |
|---|---|
| 1. Assess Surface Conditions | Thoroughly inspect kitchen surfaces for grease, moisture, and defects that could affect paint adhesion. |
| 2. Use Proper Cleaning Techniques | Clean surfaces with a degreaser and sugar soap to eliminate contaminants, ensuring optimal paint adherence. |
| 3. Address Application Errors Meticulously | Resolve imperfections like brush strokes and uneven finishes through selective sanding and multiple thin paint layers. |
| 4. Ensure Correct Primer Selection | Choose the right primer based on surface material to enhance adhesion and prevent peeling or blistering. |
| 5. Implement Regular Maintenance Routine | Keep surfaces clean using mild detergents and soft cloths to maintain the paint’s integrity and prolong its lifespan. |
Etape 1: Assess Common Kitchen Respray Issues
Before diving into your kitchen respray project, you’ll need to conduct a thorough assessment of potential challenges that could compromise your finish. Professional kitchen resprays demand meticulous preparation, and understanding common issues will help you achieve a flawless result.
Your initial evaluation should focus on surface conditions that might impact paint adhesion. Thoroughly inspect kitchen unit surfaces for grease, moisture, and wear as these factors can significantly undermine your respray quality. Grease accumulation from cooking, hard water stains, and general kitchen grime can create invisible barriers preventing paint from bonding correctly. Look closely at cabinet doors, drawer fronts, and surrounding areas for signs of:
- Greasy residue
- Slight discolouration
- Uneven surface texture
- Previous paint chipping or peeling
Careful surface preparation is not just recommended it’s absolutely essential. By identifying potential problems early, you can implement targeted cleaning and repair strategies that ensure your kitchen respray looks professional and lasts for years. Professional tip: use a degreasing solution specifically designed for kitchen surfaces, and always follow up with a light sanding to create the ideal paint adhesion surface.
The next stage involves selecting the right preparation techniques to address the specific issues you’ve identified during your assessment.
Etape 2: Prepare Surfaces for Effective Troubleshooting
Preparing kitchen surfaces for a successful respray requires strategic cleaning and detailed attention. Your goal is to create the perfect canvas that will allow paint to adhere seamlessly and produce a professional finish.
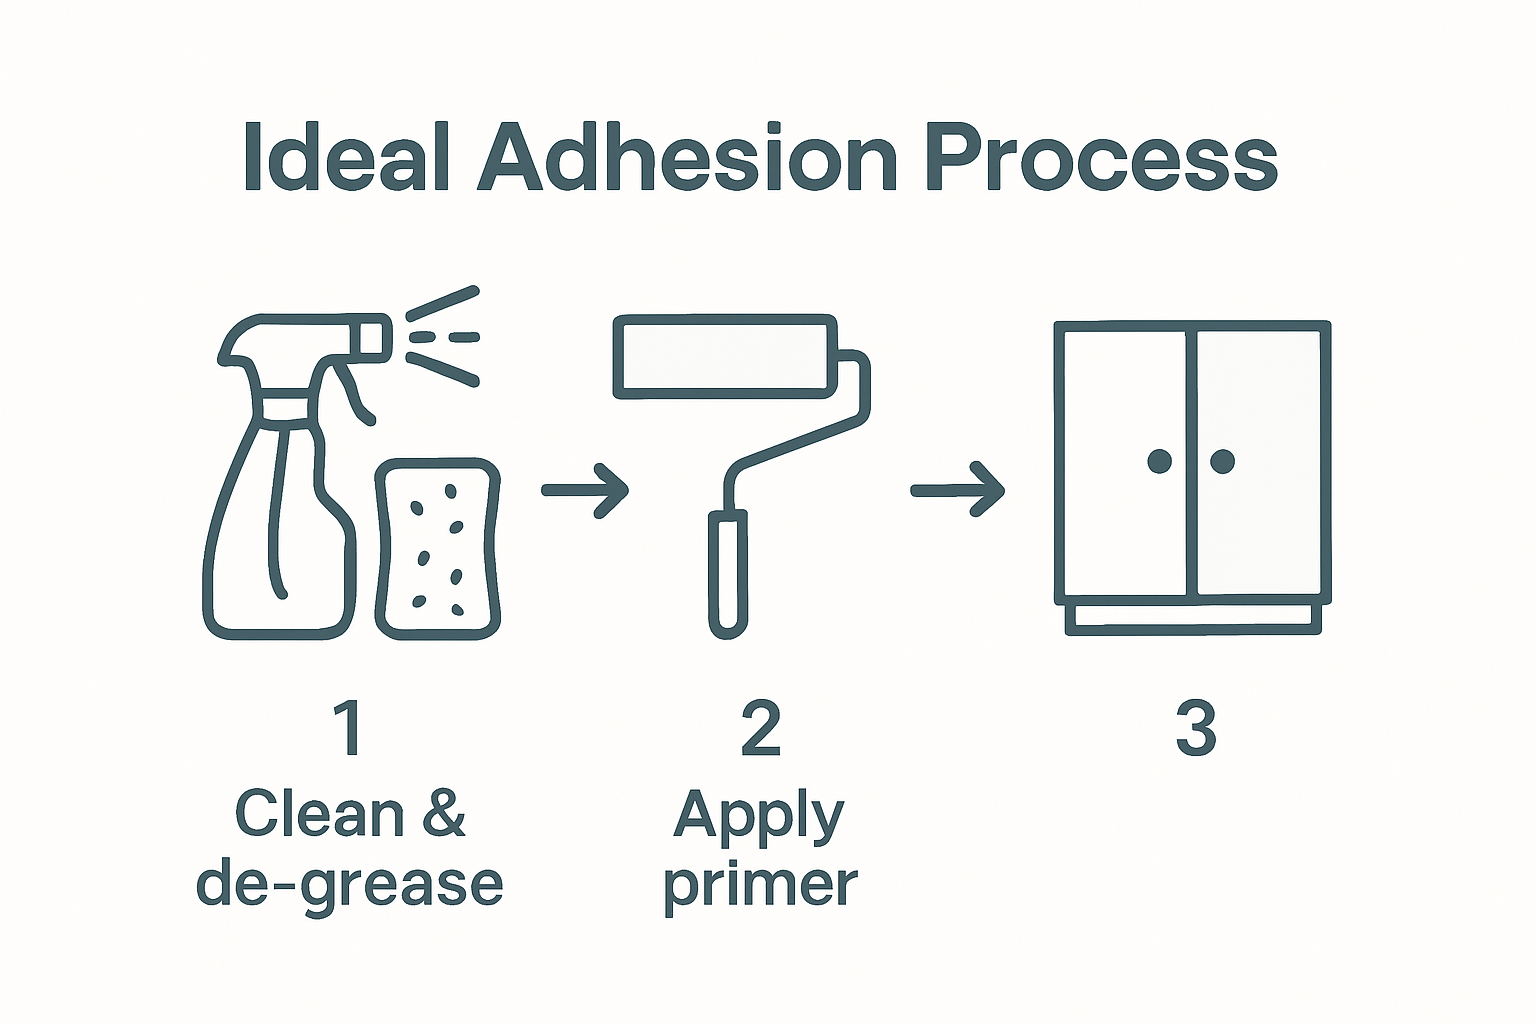
Cleaning kitchen units thoroughly with degreaser and sugar soap represents the critical first step in surface preparation. This process eliminates invisible contaminants that can sabotage your respray project. You’ll want to systematically work through each surface using the following approach:
- Remove all hardware and handles
- Apply professional degreasing solution
- Wipe down surfaces with sugar soap
- Rinse thoroughly with clean water
- Allow surfaces to dry completely
After cleaning, light sanding becomes crucial. Use fine grit sandpaper to create microscopic texture that helps paint grip the surface. Work methodically and gently to avoid damaging the underlying material. A smooth yet slightly rough surface provides optimal paint adhesion.
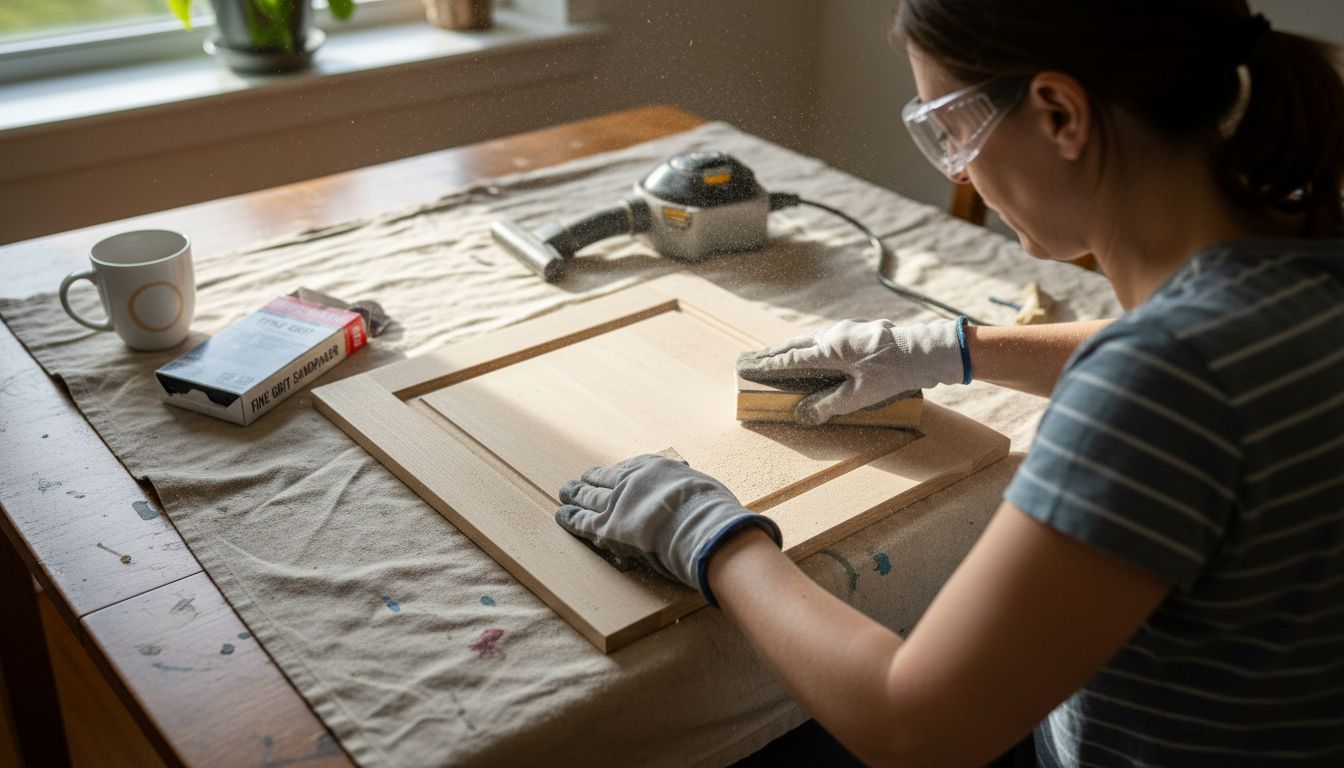
Professional tip: Wear protective gloves and ensure proper ventilation during the entire preparation process. The quality of your surface preparation directly determines the longevity and appearance of your final kitchen respray.
Etape 3: Correct Application Mistakes and Surface Defects
Resolving painting imperfections requires a strategic and patient approach. Your aim is to transform uneven or flawed surfaces into a smooth professional finish that looks like it was completed by an expert.
Addressing visible brush strokes and uneven finishes demands careful technique and precision. Common surface defects like streaking, bubbling, or patchy coverage can be rectified through methodical correction strategies. Start by identifying the specific type of imperfection you are dealing with:
- Visible brush strokes
- Uneven paint layers
- Bubbling or blistering surfaces
- Paint drips or runs
- Thin or transparent coverage
For each issue, your correction method will involve selective sanding and strategic reapplication. Use fine grit sandpaper to gently smooth problematic areas, being careful not to remove too much paint or damage the underlying surface. After sanding, wipe away dust thoroughly and apply thin, even coats of paint using high quality brushes or rollers.
Professional tip: Multiple thin layers always produce a superior finish compared to single thick applications. Take your time and allow each layer to dry completely before assessing and potentially adding another coat. Patience and attention to detail will ensure a flawless kitchen respray result.
Etape 4: Resolve Adhesion and Finish Inconsistencies
Addressing paint adhesion challenges is crucial for achieving a professional kitchen respray that looks seamless and withstands daily wear and tear. Your goal is to create a durable finish that maintains its aesthetic appeal over time.
Preventing paint peeling and ensuring proper surface preparation requires a comprehensive approach to surface treatment. Adhesion inconsistencies often stem from inadequate cleaning, inappropriate primer selection, or environmental factors that compromise paint bonding.
To resolve these issues effectively, follow these strategic steps:
- Completely strip existing problematic paint layers
- Clean surfaces using industrial strength degreaser
- Select a primer specifically matched to your surface material
- Apply primer using smooth consistent strokes
- Allow complete drying between primer and paint application
- Test paint adhesion on a small inconspicuous area first
Professional tip: Temperature and humidity dramatically impact paint adhesion. Aim to work in controlled environments between 10 to 24 degrees Celsius with moderate humidity levels. Rushing the process or working in extreme conditions will compromise your final finish. Patience and meticulous preparation are your greatest allies in achieving a flawless kitchen respray result.
Etape 5: Verify Results and Maintain Long-Lasting Quality
After completing your kitchen respray project, a thorough verification process ensures your hard work translates into a professional finish. Your final assessment will confirm the quality and durability of the newly resprayed surfaces.
Inspecting painted kitchen units and implementing proper maintenance strategies requires a systematic and careful approach. Begin by examining the entire surface under natural and artificial lighting to identify any potential imperfections that might have been missed during earlier stages:
- Check for consistent colour coverage
- Examine edges and corner areas carefully
- Look for any subtle texture irregularities
- Test surface smoothness with gentle fingertip inspection
- Verify paint adhesion by lightly pressing multiple areas
Maintaining your newly resprayed kitchen demands consistent care. Use soft microfibre cloths and mild detergents for cleaning, avoiding abrasive materials that could compromise the finish. Implement a regular cleaning routine that preserves the paint’s integrity and prevents premature wear. Protect your investment by being mindful of potential damage sources like excessive moisture, direct heat exposure, and sharp objects that might scratch the surface.
Achieve a Flawless Kitchen Respray with Professional Expertise
Facing challenges like poor paint adhesion, visible brush strokes or uneven finishes can be frustrating when respraying your kitchen units. This guide highlights the importance of meticulous surface preparation and careful application to achieve lasting, professional results. Common pitfalls such as grease residue, inadequate cleaning and environmental factors demand expert attention to avoid costly rework and maintain your kitchen’s beauty.

Discover how our professional kitchen respray service at SKR Specialists can transform your kitchen without the hassle of peeling paint or uneven surfaces. Our in-situ respraying technique ensures precise preparation and flawless application tailored to your unique kitchen needs. Ready for a stunning makeover that lasts? Explore our latest insights in the Uncategorized Archives and take the first step toward a flawless finish by visiting our home page now.
Frequently Asked Questions
What common issues should I look for before starting a kitchen respray?
Before starting your kitchen respray, inspect surfaces for grease, moisture, and wear. Look for greasy residue, discolouration, and any previous paint chipping, as these will affect paint adhesion. Address these issues with thorough cleaning and repairs to ensure a flawless finish.
How can I properly prepare kitchen surfaces before respraying?
To prepare kitchen surfaces, start by removing all hardware and cleaning them with a degreaser and sugar soap. After cleaning, light sanding will help create a texture for better paint adhesion. Ensure surfaces are completely dry before applying any paint.
What should I do if I notice brush strokes or uneven finishes during my kitchen respray?
If you see brush strokes or uneven finishes, gently sand the affected areas with fine grit sandpaper to smooth them out. After sanding, wipe away the dust and apply thin, even coats of paint, allowing each layer to dry fully before assessing further.
How can I ensure proper paint adhesion for my kitchen respray?
To ensure proper paint adhesion, thoroughly clean surfaces, use an appropriate primer, and allow it to dry completely before applying paint. Test adhesion on a small, inconspicuous area, and create an ideal environment with moderate temperature and humidity for the best results.
What steps should I take to verify the quality of my kitchen respray?
Verify the quality of your kitchen respray by inspecting surfaces for consistent colour coverage, texture, and adhesion. Check under various lighting conditions for any imperfections, and ensure the surface is smooth to the touch. Implement a regular maintenance routine to preserve the integrity of the finish.
How can I maintain the quality of my newly resprayed kitchen?
To maintain the quality of your newly resprayed kitchen, use soft microfibre cloths and mild detergents for cleaning. Avoid abrasive materials that can scratch the surface, and protect it from excessive moisture and direct heat exposure to prevent premature wear.