")
Kitchen Cabinet Makeover Steps for a Stunning Finish
Most british homeowners are surprised to learn that a full kitchen makeover can cost over £8,000, yet smart DIYers know you can achieve a fresh look for a fraction of the price by respraying your cabinets. Reducing costs while improving style has become more popular than ever across England, especially as more people seek clever ways to update dated kitchens. These step-by-step tips empower you to transform tired cabinetry with results that look professional, all without overspending.
Table of Contents
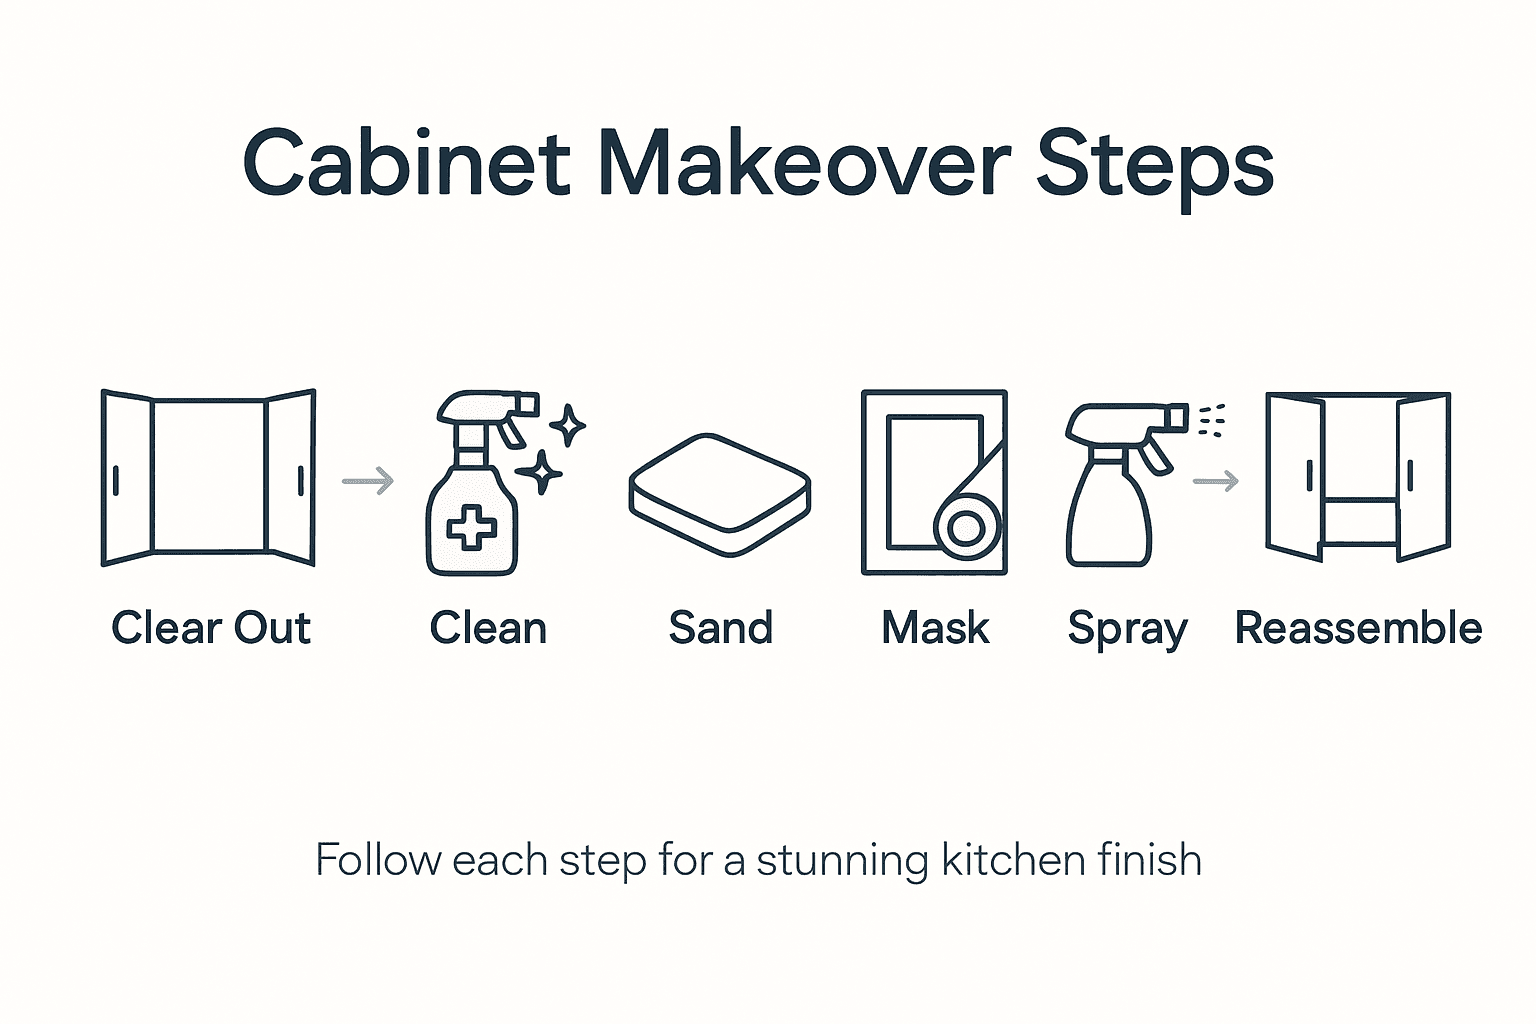
- Step 1: Assess and Clear Kitchen Cabinets
- Step 2: Clean and Prepare Surfaces for Respray
- Step 3: Sand and Mask Cabinets Effectively
- Step 4: Apply Respray for a Smooth Finish
- Step 5: Inspect and Reassemble Cabinets Properly
Quick Summary
| Key Insight | Explanation |
|---|---|
| 1. Systematic Cabinet Clearing | Remove all items from cabinets to assess their condition thoroughly. This prevents misplacing items and allows for necessary repairs. |
| 2. Thorough Surface Preparation | Clean and prepare surfaces meticulously to ensure proper paint adhesion for a long-lasting finish. Use degreasers and fine sandpaper for best results. |
| 3. Effective Sanding Techniques | Sand in the direction of the wood grain to create a rough texture for better paint grip. Avoid excessive pressure to prevent damage. |
| 4. Precise Respray Application | Apply thin, consistent coats with a spray gun, maintaining correct distance and speed to achieve a professional finish. Allow drying time between coats. |
| 5. Methodical Reassembly Process | Reassemble cabinet components in an organised manner, checking for alignment and functionality. Label parts during disassembly to simplify the process. |
Step 1: Assess and Clear Kitchen Cabinets
Preparing your kitchen cabinets for a transformative makeover begins with a comprehensive assessment and thorough clearing process. This initial step ensures you create the perfect foundation for a stunning renovation by understanding your cabinetry’s current condition and creating a clean workspace.
Start by removing every single item from your kitchen cabinets, carefully transferring crockery, food items, and cooking equipment to a designated safe area. As you empty each cabinet, thoroughly inspect the interior for signs of wear or damage. Look for potential issues like stains, mould, trapped dirt, or structural weaknesses that might require repair before your makeover begins. Pay close attention to shelf conditions, checking for warping, water damage, or loose fittings that could compromise your cabinet’s integrity.
Next, conduct a detailed evaluation of your cabinet’s hardware and structure. Check hinges, handles, and drawer slides for smooth operation, noting any components that might need replacement or adjustment. By methodically clearing and assessing your cabinets, you create an optimal environment for a successful kitchen cabinet transformation.
Expert Advice: Remove drawer and cabinet contents systematically, working from top to bottom to maintain organisation and prevent misplacing items during your kitchen makeover.
Below is a summary of common kitchen cabinet issues and recommended actions before respraying:
| Issue Detected | Possible Cause | Recommended Action |
|---|---|---|
| Warped shelves | Moisture exposure | Replace affected shelving |
| Loose hinges | Worn screws or mounts | Tighten or replace hardware |
| Stubborn stains | Food or liquid spills | Deep clean with solvent |
| Mould spots | Damp environment | Treat with mould remover |
| Flaking paint | Poor adhesion or age | Sand and prep thoroughly |
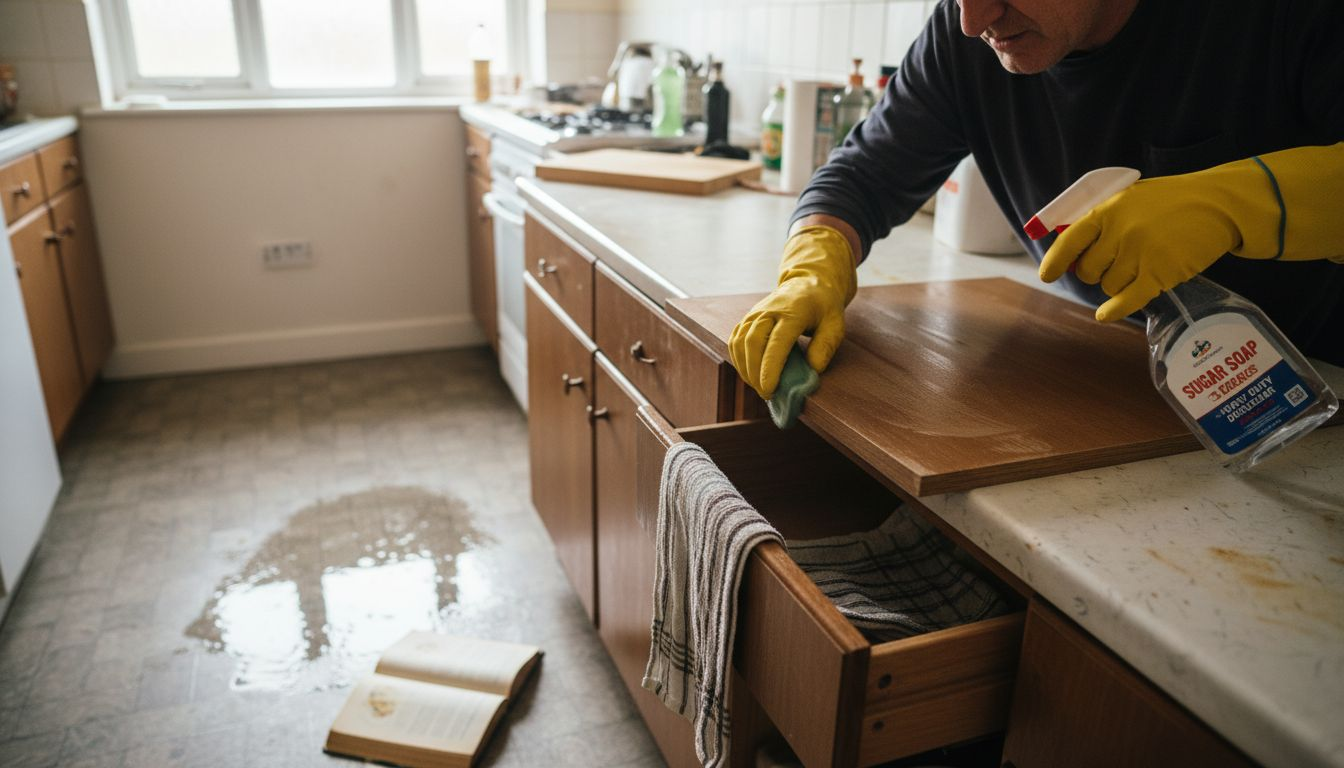
Step 2: Clean and Prepare Surfaces for Respray
Transforming your kitchen cabinets requires meticulous surface preparation to ensure a professional and long-lasting respray finish. This critical stage determines the quality and durability of your final paint application, making thorough cleaning and preparation absolutely essential.
Begin by thoroughly cleaning all cabinet surfaces using a specialist degreaser or sugar soap, paying extra attention to areas around handles and cooking zones where grease and grime accumulate. Remove all residues that could potentially interfere with paint adhesion, using a degreasing solution that cuts through stubborn kitchen grunge. After cleaning, allow surfaces to dry completely to prevent moisture trapping beneath the new paint layer.
Once clean, inspect the cabinet surfaces carefully for any imperfections. Use a light abrasive pad or fine-grit sandpaper to gently scour the surface, creating a slightly rough texture that helps the new paint grip effectively. Remove any flaking paint or uneven areas, ensuring you have a smooth pristine base for respraying. This preparation will guarantee a professional looking finish that looks seamless and polished.
Expert Advice: Always work in a well ventilated area and wear protective gloves when using strong cleaning chemicals to protect your skin and ensure thorough surface preparation.
Here is a comparison of different cleaning agents suitable for cabinet preparation:
| Cleaning Agent | Effectiveness for Grease | Suitability for Wood | Drying Time |
|---|---|---|---|
| Sugar soap | High | Safe for most types | Fast |
| Specialist degreaser | Very high | Test on surface | Moderate |
| Mild washing-up liquid | Medium | Safe for all woods | Fast |
| Vinegar solution | Low to medium | May affect finish | Fast |
Step 3: Sand and Mask Cabinets Effectively
Preparing your kitchen cabinets for a professional respray requires precise sanding and meticulous masking techniques that will ensure a flawless finish. This crucial stage transforms your rough surfaces into the perfect canvas for a stunning new look.
Sand all cabinet surfaces carefully using medium to fine grit sandpaper, working consistently in the direction of the wood grain to create an ideal surface for paint adhesion. The goal is to remove the existing gloss and create a slightly textured surface that will help the new paint grip effectively. Pay close attention to avoid applying too much pressure, which could damage the underlying wood substrate. After sanding, use a vacuum or tack cloth to remove all dust particles thoroughly, ensuring a clean surface for painting.
Masking is equally critical to achieving professional results. Carefully cover countertops, walls, floors, and adjacent surfaces with protective sheeting and painter’s masking tape. Take extra time to secure tape along all edges, including inside cabinet openings and around hardware. This precise masking prevents accidental overspray and ensures crisp, clean paint lines that give your cabinets a professional appearance.
Expert Advice: Always invest in high quality masking materials and take your time with preparation to prevent costly mistakes during the respraying process.
Step 4: Apply Respray for a Smooth Finish
Transforming your kitchen cabinets with a professional respray requires precision, patience, and the right technique to achieve a factory quality finish. This stage is where your careful preparation will truly shine through and bring your cabinet makeover to life.
Achieving a smooth finish demands using a quality spray gun with professional technique, applying multiple thin and consistent coats of specialist cabinet paint. Begin by holding the spray gun approximately 15 to 20 centimetres from the surface, moving in steady horizontal or vertical strokes that overlap slightly to ensure complete coverage. The key is maintaining a consistent speed and distance to prevent uneven application or unsightly drips. Allow each coat to dry completely before applying the next layer, which typically takes around 30 to 45 minutes depending on room temperature and paint specifications.
Carefully inspect each coat as you progress, watching for any imperfections or areas that might require additional attention. Use smooth, controlled movements and maintain a steady hand to create an even layer that mimics a professional factory finish. Remember that multiple light coats will always produce superior results compared to a single heavy application, which can lead to dripping and uneven coverage.
Expert Advice: Work in a well ventilated space with consistent room temperature and minimal dust to ensure the smoothest possible respray finish.
Step 5: Inspect and Reassemble Cabinets Properly
The final stage of your kitchen cabinet transformation requires meticulous inspection and careful reassembly to ensure your hard work results in a professional looking finish. This crucial step will determine the overall quality and longevity of your respray project.
After the final coat has completely cured, conduct a thorough visual and tactile inspection of all cabinet surfaces, checking for any imperfections such as dust nibs, uneven coverage, or minor runs. Use a soft light to highlight any potential issues and have fine grit sandpaper on hand to address small irregularities. If you discover any minor defects, gently sand them down and perform precise touch ups to maintain a flawless appearance.
Reassemble your cabinets methodically by carefully refitting doors, drawers, and hardware to their original positions. Take time to check each door alignment, ensuring smooth operation and proper closure. Use the labeled bags you prepared during disassembly to keep track of screws and small components. Adjust hinges as needed to guarantee perfect functionality, and wipe down surfaces gently to remove any handling marks that might have accumulated during the reassembly process.
Expert Advice: Create a systematic reassembly plan by laying out all hardware and components in order, working from one section of the kitchen to another to maintain organisation and reduce potential errors.
Elevate Your Kitchen Cabinet Makeover with Professional Respray Expertise
Transforming kitchen cabinets demands careful preparation and precise application to achieve a flawless, long-lasting finish. From thorough cleaning with specialist degreasers to meticulous sanding and masking, these steps can feel overwhelming and time-consuming. If you want to avoid uneven paintwork, drips, or costly mistakes, expert help is essential to bring your vision to life.

Discover how our professional kitchen respray service takes the stress out of kitchen makeovers. We respray kitchens in-situ, delivering a stunning finish using industry-leading techniques that respect your home environment and save you time. Visit our Uncategorized Archives to explore tips and insights or get started by contacting our team today at SKR Specialists. Take the first step toward a beautiful kitchen transformation now.
Frequently Asked Questions
What is the first step in a Kitchen Cabinet Makeover?
To begin a Kitchen Cabinet Makeover, assess and clear out your cabinets by removing all items. Carefully inspect the interiors for damage, stains, or structural issues that need addressing before you start your transformation.
How do I effectively clean and prepare my cabinets for respraying?
To clean and prepare your cabinets, use a specialist degreaser or sugar soap to thoroughly clean all surfaces, particularly around handles. Ensure all dirt and residues are removed to allow paint to adhere properly by letting the surfaces dry completely after cleaning.
What is the best technique for sanding kitchen cabinets before painting?
Use medium to fine grit sandpaper to sand all cabinet surfaces, working in the direction of the wood grain. This creates a slightly rough texture that aids paint adhesion and should be followed by vacuuming or wiping the surfaces to remove all dust particles.
How should I apply the spray paint for a smooth finish?
Hold the spray gun approximately 15 to 20 centimetres from the cabinet surface and apply multiple thin coats in steady strokes. Wait for each coat to dry completely before applying the next, ensuring a professional-looking finish without drips or uneven coverage.
What should I do after painting my kitchen cabinets?
After the final coat has cured, conduct a thorough inspection of the surfaces for any imperfections. Reassemble your cabinets methodically, checking for proper alignment and operation to ensure everything functions smoothly after the makeover.