")
Kitchen Spray Paint Options Guide for Cabinet Refresh
Finding the right spray paint for your kitchen cabinets can feel confusing when every product promises lasting results. Homeowners across England know that the secret to a successful kitchen refresh lies in careful planning, from assessing cabinet surfaces to choosing durable, kitchen-appropriate paint. This guide brings together top tips and practical advice for revamping your kitchen with affordable spray paint options that look great and stand the test of time.
Table of Contents
- Step 1: Assess Current Kitchen Cabinetry Surfaces
- Step 2: Select Suitable Spray Paint Options For Kitchens
- Step 3: Prepare Kitchen For In-Situ Spray Painting
- Step 4: Apply Chosen Spray Paint Evenly And Safely
- Step 5: Verify Finish And Perform Necessary Touch-Ups
Quick Summary
| Key Insight | Explanation |
|---|---|
| 1. Conduct a thorough cabinet assessment | Assess surface condition, material type, and dimensions for a successful painting strategy. |
| 2. Choose the right spray paint | Select paints with durability, moisture resistance, and suitable finish for kitchen environments. |
| 3. Prepare workspace diligently | Clear and protect areas, and ensure proper ventilation for safe and effective painting. |
| 4. Apply paint with patience | Use consistent spray techniques and multiple thin coats for an even, professional finish. |
| 5. Inspect and touch up carefully | Verify finish quality under varied light and make corrections to maintain a flawless appearance. |
Step 1: Assess current kitchen cabinetry surfaces
Before embarking on your kitchen cabinet refresh, understanding the current state of your cabinetry is crucial. A thorough surface condition assessment will determine the best spray painting approach and ensure lasting results.
Start by conducting a comprehensive visual and tactile inspection of your kitchen cabinets. Look for key indicators that will impact your painting strategy:
- Surface damage such as chips, cracks, or deep scratches
- Existing paint or finish condition (peeling, fading, or uneven surfaces)
- Material type of current cabinetry (wood, laminate, metal)
- Areas of wear around handles, edges, and high-traffic zones
Accurately measuring cabinet dimensions helps you plan paint quantities and preparation techniques. Use a precise measuring tape to record height, width, and depth of each cabinet section. Note any irregularities or structural issues that might require additional preparation.
Careful assessment now prevents potential painting complications later.
Top tip: Use natural daylight and a bright torch to reveal subtle surface imperfections that might be missed under standard lighting.
Step 2: Select suitable spray paint options for kitchens
Choosing the right spray paint for kitchen cabinetry requires careful consideration of both aesthetic and functional requirements. Paint selection for high-moisture environments demands understanding specific performance characteristics that protect your surfaces.
Consider these critical factors when selecting your kitchen cabinet spray paint:
- Durability for high-traffic kitchen areas
- Moisture resistance to prevent peeling or damage
- Finish type matching your desired aesthetic (matte, satin, semi-gloss)
- Compatibility with your existing cabinet material
Key paint categories to evaluate include:
- Water-based acrylic paints (quick-drying, low odour)
- Oil-based enamel paints (excellent durability)
- Specialised kitchen and bathroom paint formulations
When exploring environmentally friendly paint options, consider recycled or low-VOC products that offer both performance and sustainability. Professional-grade spray paints designed specifically for kitchen cabinetry will provide the most reliable and long-lasting finish.
Here is a comparison of popular spray paint types for kitchen cabinets:
| Paint Type | Drying Time | Suitability for Kitchens | Main Advantage |
|---|---|---|---|
| Water-based acrylic | 1–2 hours | High moisture areas | Low odour, easy clean-up |
| Oil-based enamel | 6–8 hours | Heavy-use, high-traffic zones | Superior durability & finish |
| Specialised kitchen formula | 2–4 hours | Designed for kitchens & baths | Enhanced resistance to wear |
| Low-VOC/recycled | Varies by brand | Eco-conscious kitchens | Environmentally sustainable |
Select a paint that balances aesthetic appeal with practical kitchen performance.
Top tip: Always purchase a small test quantity and apply a sample patch to confirm colour and finish before committing to your entire kitchen project.
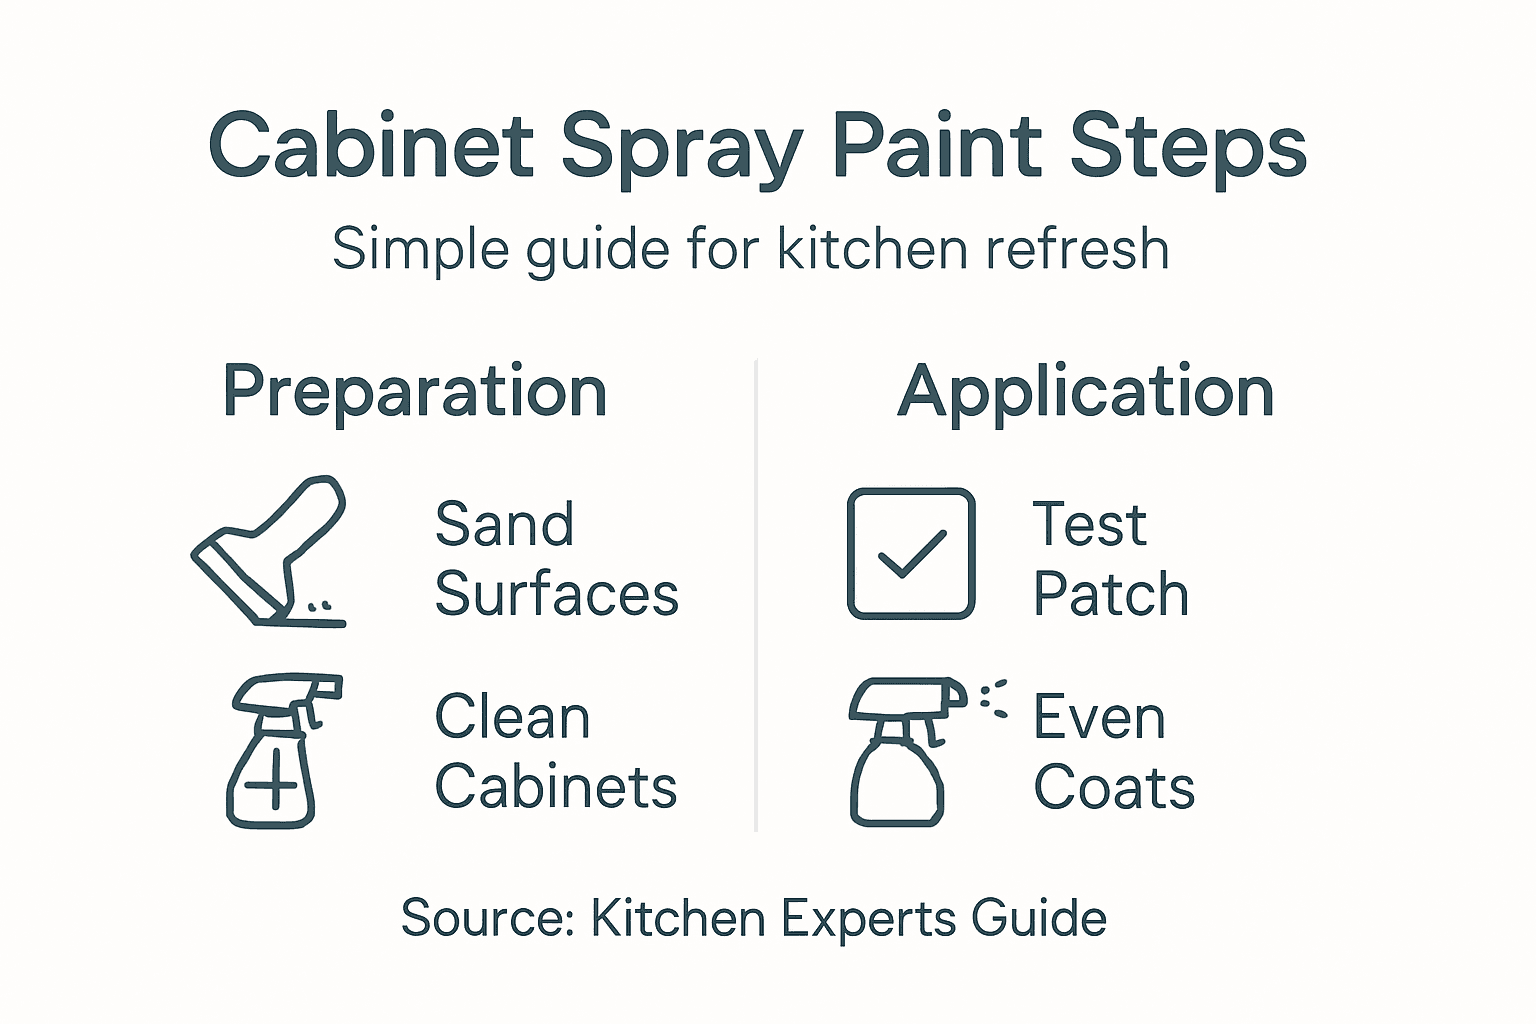
Step 3: Prepare kitchen for in-situ spray painting
Transforming your kitchen cabinets with a professional spray paint finish requires meticulous preparation. Surface preparation techniques are crucial for achieving a flawless, long-lasting result that will withstand daily kitchen activities.
Begin your preparation by creating a comprehensive workspace protection strategy:
- Clear the workspace completely by removing small appliances and delicate items
- Cover countertops with heavy-duty plastic sheeting
- Protect flooring using drop cloths or cardboard
- Seal off adjacent areas with masking tape and plastic sheeting
Prepare the cabinet surfaces through these essential steps:
- Remove all cabinet hardware (handles, knobs)
- Clean surfaces thoroughly with a degreasing solution
- Sand surfaces lightly to create optimal paint adhesion
- Repair any minor scratches or imperfections
- Wipe down surfaces with a tack cloth to remove dust
Kitchen renovation site preparation requires careful environmental control. Ensure your kitchen has adequate ventilation and maintain a consistent temperature between 10-24 degrees Celsius for optimal painting conditions.
Thorough preparation determines the quality of your final spray paint finish.
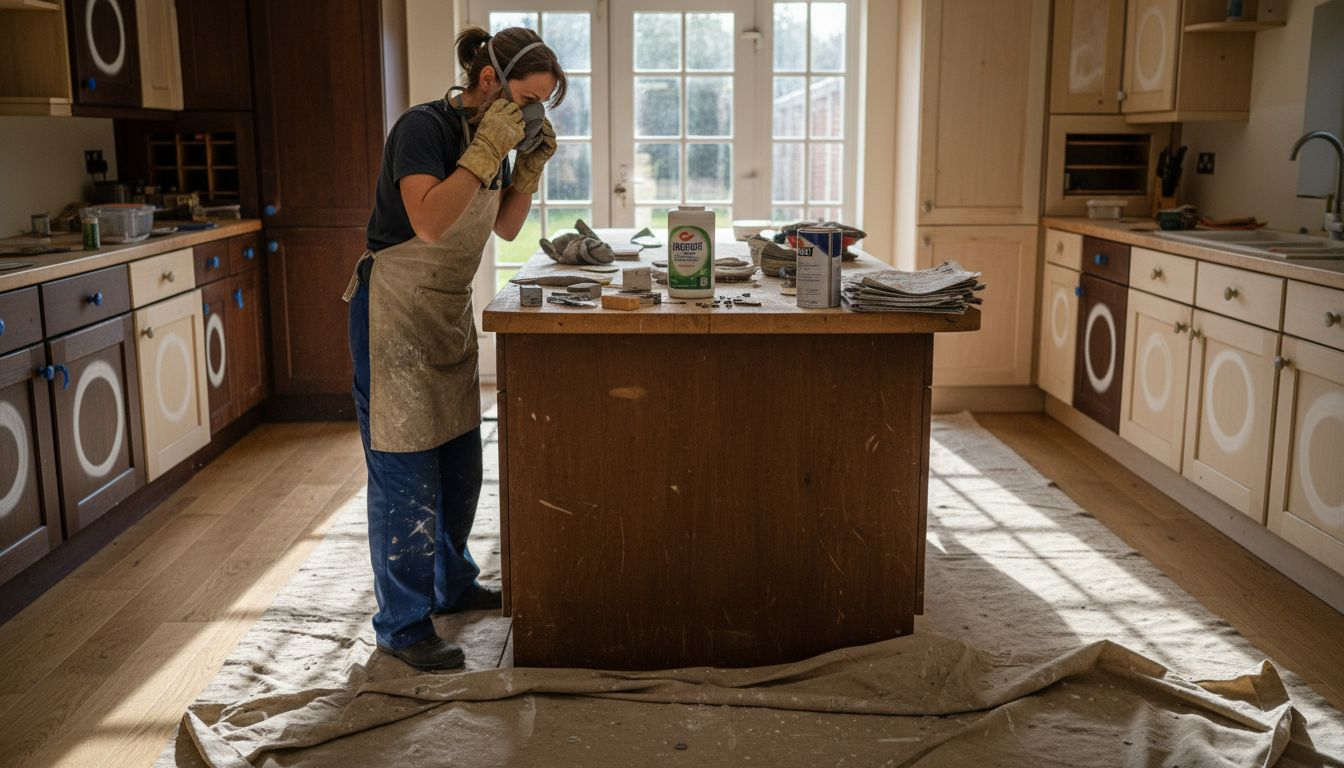
Top tip: Wear a protective respirator mask and ensure proper ventilation to safeguard your health during the preparation and painting process.
Step 4: Apply chosen spray paint evenly and safely
Applying spray paint to kitchen cabinets requires precision, patience, and strict adherence to safety protocols. Safe spray painting techniques are critical for achieving a professional finish while protecting your health.
Master the spray painting technique with these essential guidelines:
- Maintain consistent distance between spray nozzle and surface (approximately 15-20 centimetres)
- Move in smooth, parallel strokes to ensure even coverage
- Overlap each pass by approximately 50% to prevent patchy application
- Apply multiple thin coats rather than one thick layer
Critical safety equipment for your painting project:
- Wear a respirator mask with organic vapour cartridges
- Use protective safety glasses
- Don disposable gloves
- Wear protective clothing that covers exposed skin
Professional painting application methods recommend a systematic approach to achieving a flawless finish. Work in a well-ventilated area, ideally with windows open and fans creating cross-ventilation to disperse potentially harmful fumes.
Patience and technique are more important than speed when spray painting.
Top tip: Test your spray technique on a cardboard surface first to understand your spray pattern and develop a consistent motion before painting your cabinets.
Step 5: Verify finish and perform necessary touch-ups
After applying your spray paint, critical inspection ensures a professional-looking kitchen cabinet refresh. Paint touch-up techniques require careful evaluation to maintain a consistent, high-quality finish.
Conduct a comprehensive finish inspection using these systematic steps:
- Check lighting conditions by examining surfaces under natural and artificial light
- Inspect from multiple angles to reveal subtle imperfections
- Run your hand gently over painted surfaces to detect uneven areas
- Compare against original colour reference to confirm consistent coverage
Touch-up procedures for minor imperfections:
- Clean the specific area with a lint-free cloth
- Lightly sand any uneven spots
- Apply matching spray paint in thin, controlled layers
- Blend touch-up area with surrounding surface
- Allow adequate drying time between applications
Professional finish verification methods recommend comparing against reference samples to ensure uniformity. Patience and precision are key to achieving a seamless result.
To help you track your spray painting progress, refer to this kitchen project checklist:
| Task | Priority | Suggested Timing |
|---|---|---|
| Surface assessment | High | Preparation day one |
| Paint type test patch | Medium | 2–3 days before main |
| Workspace protection | High | Just before painting |
| Application of first coat | High | Day of painting |
| Final finish inspection | Critical | 24 hours after painting |
| Touch-ups and corrections | Medium | 1–2 days after finish |
Small, careful corrections prevent the need for complete repainting.
Top tip: Keep leftover spray paint for future touch-ups and store in a cool, dry place away from direct sunlight.
Refresh Your Kitchen Cabinets with Expert Spray Painting Services
Choosing the right spray paint and ensuring flawless application can be overwhelming. From assessing cabinet surfaces to selecting durable, moisture-resistant paints and achieving an even finish, many homeowners struggle with the details that affect lasting results. If you want to avoid common issues like uneven coverage or peeling paint, professional in-situ kitchen respraying offers the perfect solution.

Discover how our skilled team at SKR Specialists can transform your kitchen cabinets effortlessly. We handle every step with care, utilising advanced spray painting techniques tailored for kitchen environments. Take the stress out of preparation and finish verification by trusting experts who deliver stunning, long-lasting results. Visit our Uncategorized Archives to learn more about our approach, or explore the full range of services on our homepage. Contact us today for a consultation and give your kitchen the refresh it deserves.
Frequently Asked Questions
What factors should I consider when selecting spray paint for kitchen cabinets?
Choosing the right spray paint involves assessing durability, moisture resistance, and finish type. Ensure that the paint matches your existing cabinet material and is suitable for high-traffic areas. Plan to evaluate paint options based on these criteria before starting your cabinet refresh.
How can I prepare my kitchen cabinets for spray painting?
Begin by removing all cabinet hardware and cleaning surfaces with a degreasing solution. Sand the surfaces lightly to promote paint adhesion and protect surrounding areas with sheeting and tape, ensuring minimal mess during the process. This preparation will help achieve a flawless finish once the paint is applied.
How should I apply spray paint to my kitchen cabinets for the best results?
Apply spray paint in smooth, parallel strokes while maintaining a distance of approximately 15-20 centimetres from the cabinet surface. Overlap each pass by about 50% to avoid patchy coverage, and apply multiple thin coats rather than one thick layer for a more even finish. Practising this technique can significantly improve your results.
What should I do if I notice imperfections after spray painting my cabinets?
Inspect the painted surfaces under various lighting conditions for any imperfections, and perform touch-ups as needed. Clean the affected area, lightly sand it, and reapply matching spray paint in thin layers to blend the touch-up seamlessly. This careful approach will help maintain a consistent finish across your cabinets.
How can I ensure durability in my kitchen cabinet paint job?
Select spray paint designed for use in high-moisture environments and high-traffic areas to enhance the durability of your finish. Proper surface preparation and applying multiple thin coats will also contribute to a long-lasting result, allowing you to enjoy your refreshed kitchen cabinets for years to come.
Is it important to test paint colours before applying them to my kitchen cabinets?
Yes, always test a small quantity of paint on an inconspicuous area or a sample patch. This step will help ensure the colour and finish meet your expectations before committing to painting your entire kitchen. Taking this precaution can save you time and effort later in the project.