")
Quick Kitchen Respray Process for Fast Makeovers
Over 60 percent of british homeowners want to improve their kitchen without the expense of a full renovation. Choosing a professional respray can transform tired cabinets and surfaces for a fraction of the cost, but results depend on careful preparation and the right techniques. Understanding each step means you can achieve a flawless kitchen finish that stands up to everyday use and keeps your space looking fresh year after year.
Table of Contents
- Stage 1: Prepare And Protect Kitchen Surfaces
- Stage 2: Clean And Sand Cabinet Exteriors
- Stage 3: Apply Specialist Primer Evenly
- Stage 4: Spray Respray Coats For Full Coverage
- Stage 5: Inspect And Finish For Lasting Results
Quick Summary
| Core Insight | Explanation |
|---|---|
| 1. Thoroughly clean surfaces | Use a gentle degreasing solution to remove grease and residue for better paint adhesion. |
| 2. Sand cabinet exteriors | Lightly sand surfaces with fine-grit sandpaper to create a texture for better paint bonding. |
| 3. Apply the right primer | Choose a primer suitable for your cabinet material to ensure optimal paint adhesion and finish. |
| 4. Use spray technique for coats | Apply multiple thin coats using a spray gun to prevent drips and achieve an even finish. |
| 5. Inspect and touch up | After painting, inspect for imperfections and execute touch-ups for a flawless final look. |
Stage 1: Prepare and protect kitchen surfaces
Protecting your kitchen surfaces is a critical first step in achieving a professional respray finish that will look stunning and last for years. According to Warwickshire Rural Housing Association, proper surface preparation can significantly extend the longevity of your kitchen makeover.
Begin by thoroughly cleaning all surfaces using a gentle degreasing solution and soft microfibre cloths. Remove any existing grime, cooking residue, and grease which could interfere with paint adhesion. Pay special attention to areas around cookers, near sinks, and behind appliances where grease tends to accumulate. The Federation of Master Builders recommends using appropriate cleaning methods specific to your surface material to prevent potential damage.
Once cleaned, carefully inspect surfaces for any chips, cracks, or uneven areas. Use fine-grit sandpaper to gently smooth these imperfections and create a uniform surface that will provide an excellent base for your respray. Wipe down surfaces with a lint-free cloth after sanding to remove all dust particles. A meticulously prepared surface ensures your new kitchen finish will look professional and resist wear and tear for years to come.
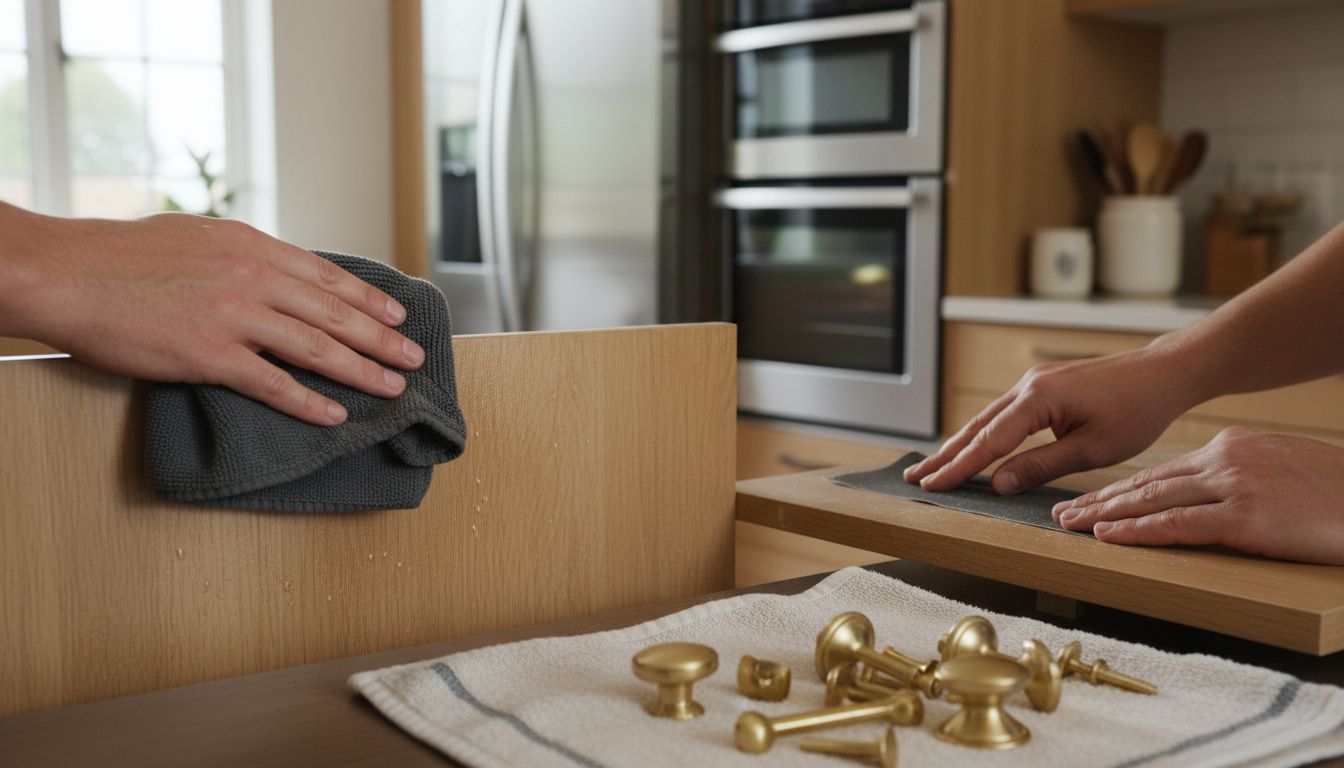
Stage 2: Clean and sand cabinet exteriors
Cleaning and sanding cabinet exteriors is a crucial step in achieving a professional kitchen respray finish. According to DIY Doctor, thorough preparation is essential to ensure paint adhesion and a smooth final result.
Begin by removing all cabinet hardware including handles, knobs, and hinges to create a clean workspace. As recommended by the National Residential Landlords Association, use a strong degreasing solution and microfibre cloths to meticulously clean every surface. Focus on removing accumulated cooking residues, fingerprints, and greasy buildup. Pay extra attention to areas around handles and edges where grime tends to collect.
Once cleaned, use fine-grit sandpaper to gently roughen the cabinet surfaces. This creates a slightly textured finish that helps new paint adhere more effectively. Sand in smooth, consistent motions following the wood grain to avoid creating visible scratches. After sanding, wipe down the surfaces with a tack cloth to remove all dust particles. For wooden cabinets, this preparation ensures a flawless, professional looking respray that will transform your kitchen’s appearance.
 For a comprehensive guide on refinishing techniques, check out our kitchen cabinet refinishing guide to ensure the best possible results.
Stage 3: Apply specialist primer evenly
Applying the right primer is a critical step in achieving a professional kitchen respray that will look stunning and last for years. DIY Doctor emphasises the importance of selecting a specialist primer tailored specifically to your cabinet material to ensure optimal paint adhesion and a flawless finish.
Start by choosing the appropriate primer for your surface type. For wooden cabinets, use a dedicated timber primer. For laminate surfaces, select a melamine primer designed to create a strong bonding surface. As recommended by the National Residential Landlords Association, begin priming with a high-quality paintbrush for detailed areas like edges, corners, and decorative elements. Work methodically to ensure complete coverage without leaving drips or uneven patches.
Once you have detailed the edges, switch to a foam roller for larger surface areas. Roll in smooth, consistent strokes to create an even layer of primer. Apply thin coats rather than one thick layer, allowing each coat to dry completely before applying the next. This approach prevents dripping, ensures better adhesion, and creates a smoother base for your final paint colour.
For more in-depth guidance on achieving professional results, check out our kitchen cabinet touch up process for additional expert tips.
Stage 4: Spray respray coats for full coverage
Achieving a professional kitchen respray requires precision and technique in applying your paint coats. Cambium Joiners Glasgow highlights the importance of strategic spraying techniques to ensure comprehensive and flawless coverage across your kitchen surfaces.
Start by removing cabinet doors for optimal spraying access. As recommended by the National Residential Landlords Association, mask off areas that should not be painted and prepare a well ventilated workspace. Use a professional grade spray gun with an even nozzle setting to apply thin consistent coats. Begin spraying from the edges and work your way inward, maintaining a consistent distance of about 15 centimetres from the surface. Apply multiple light coats rather than one heavy coat to prevent drips and ensure a smooth finish.
Allow each coat to dry completely before applying the next layer. This approach helps prevent runs, ensures better paint adhesion, and creates a more professional looking result. Patience is key when spraying to achieve that showroom quality finish. For more detailed insights into kitchen spraying techniques, explore our guide to understanding kitchen spray coating for expert recommendations.
Stage 5: Inspect and finish for lasting results
The final stage of your kitchen respray is crucial for achieving a professional and durable finish. DIY Doctor emphasises the importance of careful inspection and potential touch ups to ensure a flawless result across all surfaces.
After allowing your final coat to dry completely, carefully inspect each surface under good lighting. Look for any missed spots, uneven areas, or subtle imperfections that might need attention. As recommended by the National Residential Landlords Association, allow cabinet doors to dry for at least 12 hours before reinstallation. This extended drying time ensures the paint sets properly and creates a more resilient finish.
Gently reattach all hardware, taking care not to scratch your newly sprayed surfaces. If you notice any minor inconsistencies, use a fine paintbrush for precise touch ups. For comprehensive guidance on maintaining your newly refreshed kitchen, check out our kitchen paint finish guide for a flawless update to preserve your stunning new look for years to come.
Transform Your Kitchen Quickly and Professionally with Our Respray Service
Are you struggling with the complexity of preparing and respraying your kitchen surfaces for a fast makeover The detailed steps from cleaning and sanding to specialist priming and spraying can be overwhelming. You want a flawless, long-lasting finish without the stress of intricate preparation or uneven results. The article highlights the importance of thorough cleaning, precise sanding, specialist primers, and expert spray techniques to achieve a professional kitchen respray. These can be challenging for anyone without the right tools and experience

Take the guesswork out of your kitchen respray by choosing our expert team at SKR Specialists. We respray kitchens in-situ using proven methods that respect all the essential stages described, delivering a stunning makeover fast. Explore insights in our Uncategorized Archives to understand more about our approach. Don’t put up with dull or damaged surfaces any longer when a professional finish is just one click away. Visit us now at https://skrspecialists.co.uk and schedule your quick kitchen transformation today.
Frequently Asked Questions
What are the initial steps in the quick kitchen respray process?
To begin a quick kitchen respray, start by protecting and preparing all kitchen surfaces. Thoroughly clean surfaces to remove grease and grime, then inspect for any imperfections that need sanding before you proceed with priming and painting.
How do I ensure proper paint adhesion during the respray?
Ensuring proper paint adhesion involves cleaning and sanding cabinet exteriors to create a textured surface that helps the paint stick. Use fine-grit sandpaper to gently roughen the surfaces; this will provide a solid base for the primer and paint.
What type of primer should I use on my kitchen cabinets?
Select a primer specifically designed for your cabinet material; for instance, use a timber primer for wooden cabinets and a melamine primer for laminate surfaces. Apply the primer evenly using a high-quality paintbrush for detailed areas and a foam roller for larger sections, allowing each coat to dry completely.
How do I apply paint for a smooth, even finish?
To achieve a smooth, even finish, spray multiple thin coats of paint rather than one heavy coat. Maintain a consistent distance of about 15 centimetres from the surface and allow each layer to dry before applying the next, ensuring comprehensive coverage.
What should I do after the final coat has dried?
After the final coat has dried completely, inspect all surfaces for any imperfections and perform touch-ups as needed. Once satisfied, reattach cabinet hardware gently to avoid damaging the new finish, and allow at least 12 hours for everything to set properly before using the kitchen.
![]()
How long will my kitchen respray last?
A well-executed kitchen respray can last for many years if properly prepared and applied. To maintain the respray, keep surfaces clean and avoid harsh chemicals, aiming for regular touch-ups where necessary to preserve the finish.
Recommended
- 7 Proven Kitchen Refresh Ideas for a Brighter Home – WordPress
- Complete Guide to Kitchen Respray for Open‑Plan Homes – WordPress
- Complete Guide to Kitchen Respray Best Practices – WordPress
- Complete Guide to Why Respray Kitchen Doors – WordPress
- How to Clean After Renovation in McKinney: 2025 Guide
- 7 Small Kitchen Extension Ideas Before and After Improvement – Reltic Extend