")
Essential Kitchen Cabinet Restoration Steps for UK Homes
Most British homeowners face rising costs when planning kitchen makeovers, but restoring cabinets can transform the look of your home for a fraction of the price. With professional cabinet replacement averaging over £4,000 across England, learning how to revive tired surfaces gives you a budget-friendly solution to boost kitchen appeal. This guide covers every stage, from prepping your British home’s kitchen to respraying and inspecting for a flawless finish, so you can achieve professional results with simple step-by-step methods.
Table of Contents
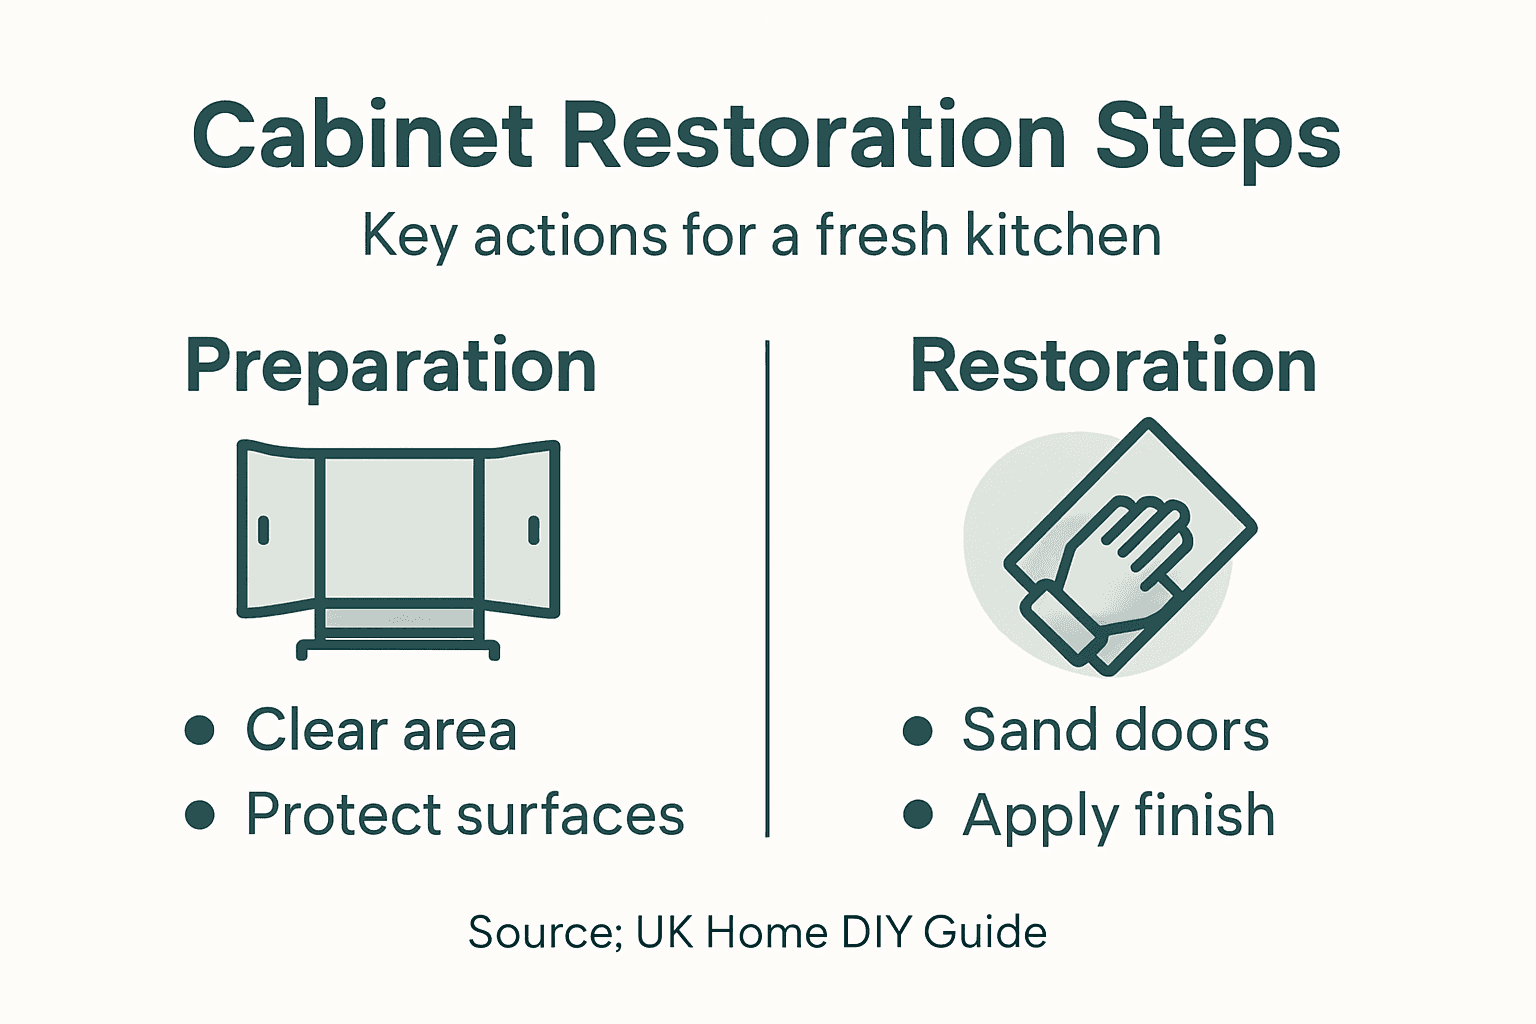
- Step 1: Prepare Surfaces And Protect The Kitchen
- Step 2: Clean And Degrease Cabinets Thoroughly
- Step 3: Repair Imperfections And Sand For Respray
- Step 4: Apply Primer And Respray Cabinets Evenly
- Step 5: Inspect Finish And Refit Cabinet Hardware
Quick Summary
| Key Point | Explanation |
|---|---|
| 1. Clear Work Area | Remove appliances and cover surfaces with protective sheeting to prevent damage during restoration. |
| 2. Thorough Cleaning | Use a mild degreasing solution to clean cabinets, ensuring optimal paint adhesion for a professional finish. |
| 3. Repair Surface Imperfections | Inspect and fill cracks or dents with wood filler to create a smooth surface before sanding. |
| 4. Apply Primer and Paint Evenly | Use thin, even layers of primer and paint to achieve a seamless finish that enhances durability. |
| 5. Inspect and Reinstall Hardware | Carefully examine painted surfaces for flaws and ensure hardware is properly reinstalled for a polished look. |
Step 1: Prepare surfaces and protect the kitchen
Preparing your kitchen workspace is crucial before starting any cabinet restoration project. Your goal is to create a clean, protected environment that prevents damage and ensures a professional finish. Kitchen cabinet cleaning strategies begin with strategic surface protection and comprehensive workspace preparation.
Start by clearing all countertops, removing small appliances, decorative items, and anything that might obstruct your work area. Use high-quality painter’s tape to secure plastic sheeting or drop cloths across floors, countertops, and nearby furniture. This protective barrier shields surfaces from dust, paint splashes, and cleaning solution drips. Ensure the sheeting extends at least 1.5 metres around your working zone, creating a comprehensive protective zone.
Open windows and doors to establish proper ventilation, which helps manage fumes from cleaning solutions and provides a comfortable working environment. Place fans strategically to direct airflow away from freshly cleaned or treated surfaces. Consider wearing protective gear like safety glasses, dust masks, and lightweight gloves to protect yourself during the restoration process.
Below is a summary of essential protective gear and why each item is important during cabinet restoration:
| Protective Gear | Purpose |
|---|---|
| Safety glasses | Shield eyes from dust and splashes |
| Dust mask | Prevent inhalation of fine particles |
| Lightweight gloves | Protect skin from chemicals |
| Old clothing | Prevent paint and dust stains |
| Knee pads | Provide comfort for floor work |
Top Tip: Remove electrical outlet covers and light switch plates before starting work to prevent accidental paint or cleaning solution splashes and ensure a truly professional finish.
Step 2: Clean and degrease cabinets thoroughly
Cleaning and degreasing your kitchen cabinets is a critical preparation step that ensures optimal paint adhesion and a professional finish. Proper surface preparation removes years of accumulated cooking residues, grease, and grime that could compromise your restoration project. Thorough cabinet cleaning techniques are essential for achieving flawless results.
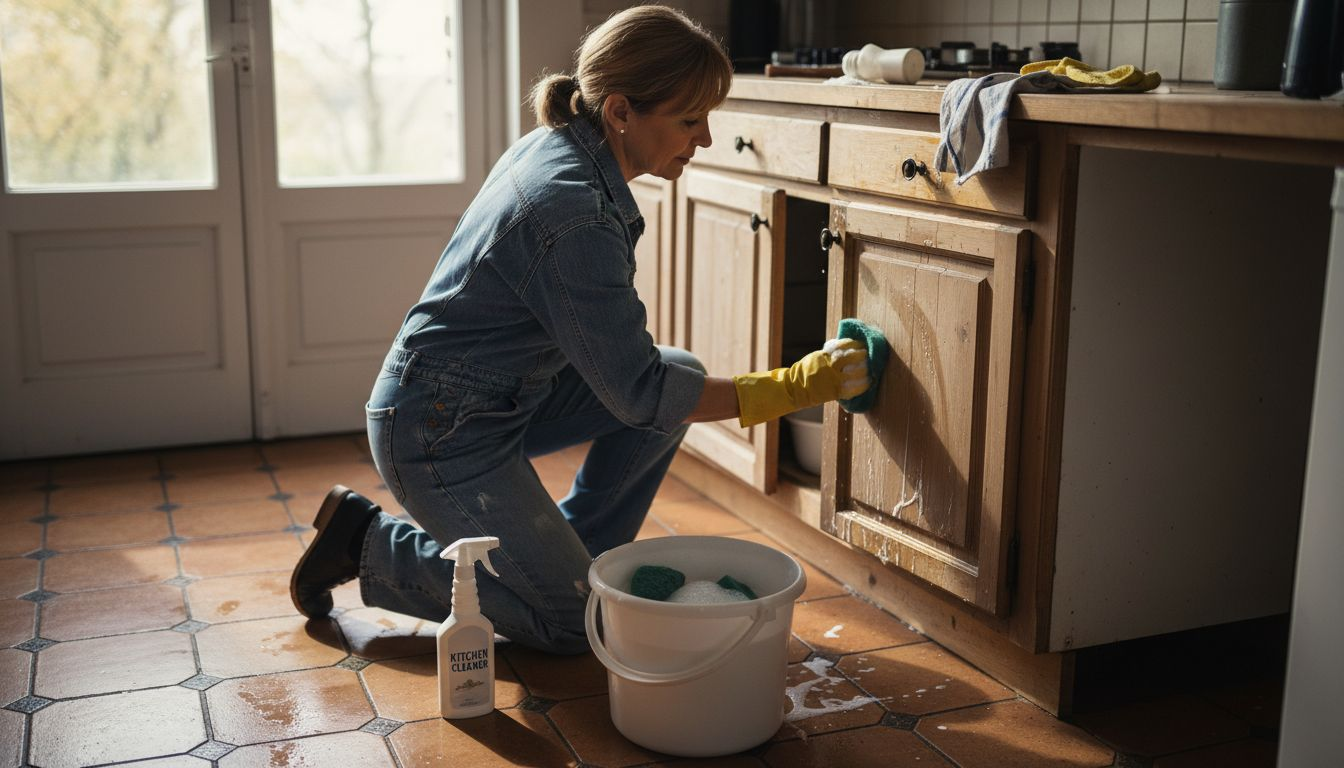
Begin by mixing a gentle degreasing solution using warm water and mild detergent or a specialised kitchen cabinet cleaner. Work systematically from top to bottom, using soft microfibre cloths to prevent scratching delicate surfaces. Pay extra attention to areas near handles, cooking zones, and corners where grease tends to accumulate heavily. Use circular motions when cleaning, ensuring you thoroughly remove all sticky residues without saturating the wood or laminate surfaces.
Rinse your cleaning cloths frequently and change your water to prevent redistributing dirt. After the initial cleaning, prepare a second pass with a fresh cloth and clean water to remove any remaining cleaning solution. Allow the cabinets to air dry completely or use clean lint-free towels to dry the surfaces thoroughly. Ensure no moisture remains, as this could affect paint or respray adhesion.
Top Tip: Always test your cleaning solution on a small inconspicuous area first to ensure it does not damage or discolour the cabinet surface.
Step 3: Repair imperfections and sand for respray
Transforming your kitchen cabinets requires meticulous surface preparation, focusing on repairing any structural imperfections and creating a smooth foundation for respraying. Cabinet surface preparation techniques are crucial for achieving a professional finish that looks seamless and elegant.
Begin by carefully inspecting each cabinet door and surface for cracks, dents, holes, or uneven areas. Use a high-quality wood filler to address these imperfections, applying it carefully with a flexible putty knife and ensuring a smooth application. Work methodically across each surface, filling gaps and smoothing out the filler to create an even plane. Allow the wood filler to dry completely according to the manufacturer’s instructions typically between two to four hours.
Once the filler has dried, use medium-grit sandpaper (120 to 150 grit) to create a uniform surface. Sand all cabinet surfaces evenly using gentle circular motions, taking care to remove any gloss and create a slightly rough texture that will help primer and paint adhere effectively. Pay special attention to previously filled areas, ensuring they are completely level with the surrounding surface. Remove all sanding dust using a tack cloth or soft microfibre cloth to prepare for the next stage of your kitchen cabinet restoration.
Top Tip: Wear a dust mask and safety glasses during sanding to protect yourself from fine particles and ensure a clean working environment.
Here is a comparison of common kitchen cabinet surface issues and the recommended restoration approach:
| Surface Issue | Identification Tip | Recommended Solution |
|---|---|---|
| Minor cracks | Visible hairline fractures | Fill with wood filler |
| Dents | Small depressions or indents | Level with wood filler |
| Grease build-up | Sticky patches near handles | Use mild degreasing agent |
| Glossy finishes | Reflective, smooth to the touch | Sand with medium-grit paper |
| Uneven surfaces | Noticeable lumps or bumps | Sand and apply wood filler |
Step 4: Apply primer and respray cabinets evenly
Priming and respraying your kitchen cabinets is the transformative stage that will determine the final aesthetic and durability of your restoration project. Professional kitchen respray techniques require precision and careful application to achieve a flawless finish.
Begin by selecting a high-quality primer specifically designed for kitchen surfaces. Using a foam roller or high-quality synthetic brush, apply the primer in thin, even strokes, working systematically across each cabinet surface. Ensure complete coverage while avoiding thick applications that could cause dripping or uneven texture. Allow the primer to dry completely according to the manufacturer’s instructions typically between two to four hours. This critical layer creates a smooth base that improves paint adhesion and provides a uniform foundation for your respray.
When respraying, select a paint formulated for kitchen cabinetry and use smooth, consistent sweeping motions to apply thin coats. Hold the spray can or spray gun approximately 15 to 20 centimetres from the surface, moving in controlled parallel strokes to prevent pooling or uneven coverage. Apply multiple light coats rather than one heavy coat, allowing each layer to dry completely before applying the next. This technique ensures a professional looking finish with maximum durability and minimal visible imperfections.
Top Tip: Work in a well-ventilated area with consistent room temperature to prevent dust settling and ensure optimal paint drying conditions.
Step 5: Inspect finish and refit cabinet hardware
The final stage of your kitchen cabinet restoration project requires meticulous attention to detail to ensure a professional and polished result. Cabinet refinishing techniques emphasise the importance of careful inspection and precise hardware reinstallation.
Begin by thoroughly examining the painted surfaces under good natural light, looking for any uneven areas, drips, or imperfections. Run your hand gently across the surface to detect any subtle irregularities. If you notice minor flaws, use fine-grit sandpaper to lightly smooth these areas, being careful not to remove too much of the new paint finish. Take time to clean the original hardware or consider replacing it with new knobs and handles that complement your freshly restored cabinets.
Reinstall the hardware systematically, referring to the labels or photographs you created during the initial removal. Ensure each hinge, handle, and drawer pull is securely fastened and aligned perfectly. Check that doors open and close smoothly, with consistent gaps between cabinet frames. Test the alignment by opening and closing each door multiple times, making minor adjustments as needed to guarantee a professional finish that looks as good as new.
Top Tip: Keep a small artist’s paintbrush handy to touch up any tiny imperfections or screw holes after hardware reinstallation.
Transform Your Kitchen Cabinets with Expert Respray Solutions
Restoring kitchen cabinets is a detailed process that involves careful preparation, thorough cleaning, precise sanding, and expert respraying to achieve a flawless finish. Many homeowners struggle with stubborn grease, uneven surfaces, or finding the right primer and paint for durability. Our professional team understands these challenges and offers seamless in-situ kitchen respray services that breathe new life into your cabinets without the mess of a full renovation. Discover effective restoration methods and find the right support through our Uncategorized Archives that showcase practical advice to elevate your kitchen’s style.

Take the stress out of cabinet restoration by choosing specialists who will protect your kitchen surfaces, repair imperfections, and apply expert respray techniques for a long-lasting finish. Visit our website today to explore how we can bring your kitchen cabinets back to life while you enjoy your home uninterrupted. Start your effortless transformation now with trusted professionals dedicated to flawless results.
Frequently Asked Questions
What are the first steps in preparing for kitchen cabinet restoration?
Start by removing all items from your countertops and covering them with protective sheeting. Secure plastic sheeting over floors and furniture, extending at least 1.5 metres around your working area to prevent damage.
How do I clean and degrease my kitchen cabinets effectively?
Mix a gentle degreasing solution with warm water and a mild detergent. Use soft microfibre cloths to systematically clean from top to bottom, especially focusing on areas near handles where grease accumulates.
What should I look for when inspecting my cabinets for repairs?
Examine each cabinet door for cracks, dents, or uneven surfaces. Use a high-quality wood filler to address these imperfections, ensuring a smooth application before allowing it to dry completely.
How can I ensure a professional finish when priming and respraying my cabinets?
Apply high-quality primer in thin, even strokes and allow it to dry completely before respraying with kitchen cabinetry paint. Use smooth, consistent sweeping motions while keeping a distance of 15 to 20 centimetres from the surface for even coverage.
What final checks should I make after respraying my kitchen cabinets?
Inspect the painted surfaces under good natural light for any imperfections, smoothing them with fine-grit sandpaper if necessary. Reinstall cabinet hardware carefully, ensuring everything is aligned and functions smoothly before finishing the project.
Recommended
- Kitchen Cabinet Cleaning Process for Spotless Results – WordPress
- Kitchen Cabinet Touch Up Process for Flawless Results – WordPress
- Kitchen Cabinet Refinishing Guide for Flawless Results – WordPress
- 7 Inspiring Examples of Kitchen Transformations to Try – WordPress
- 7 Essential Steps for a Construction Budget Checklist UK – My Project Estimating