")
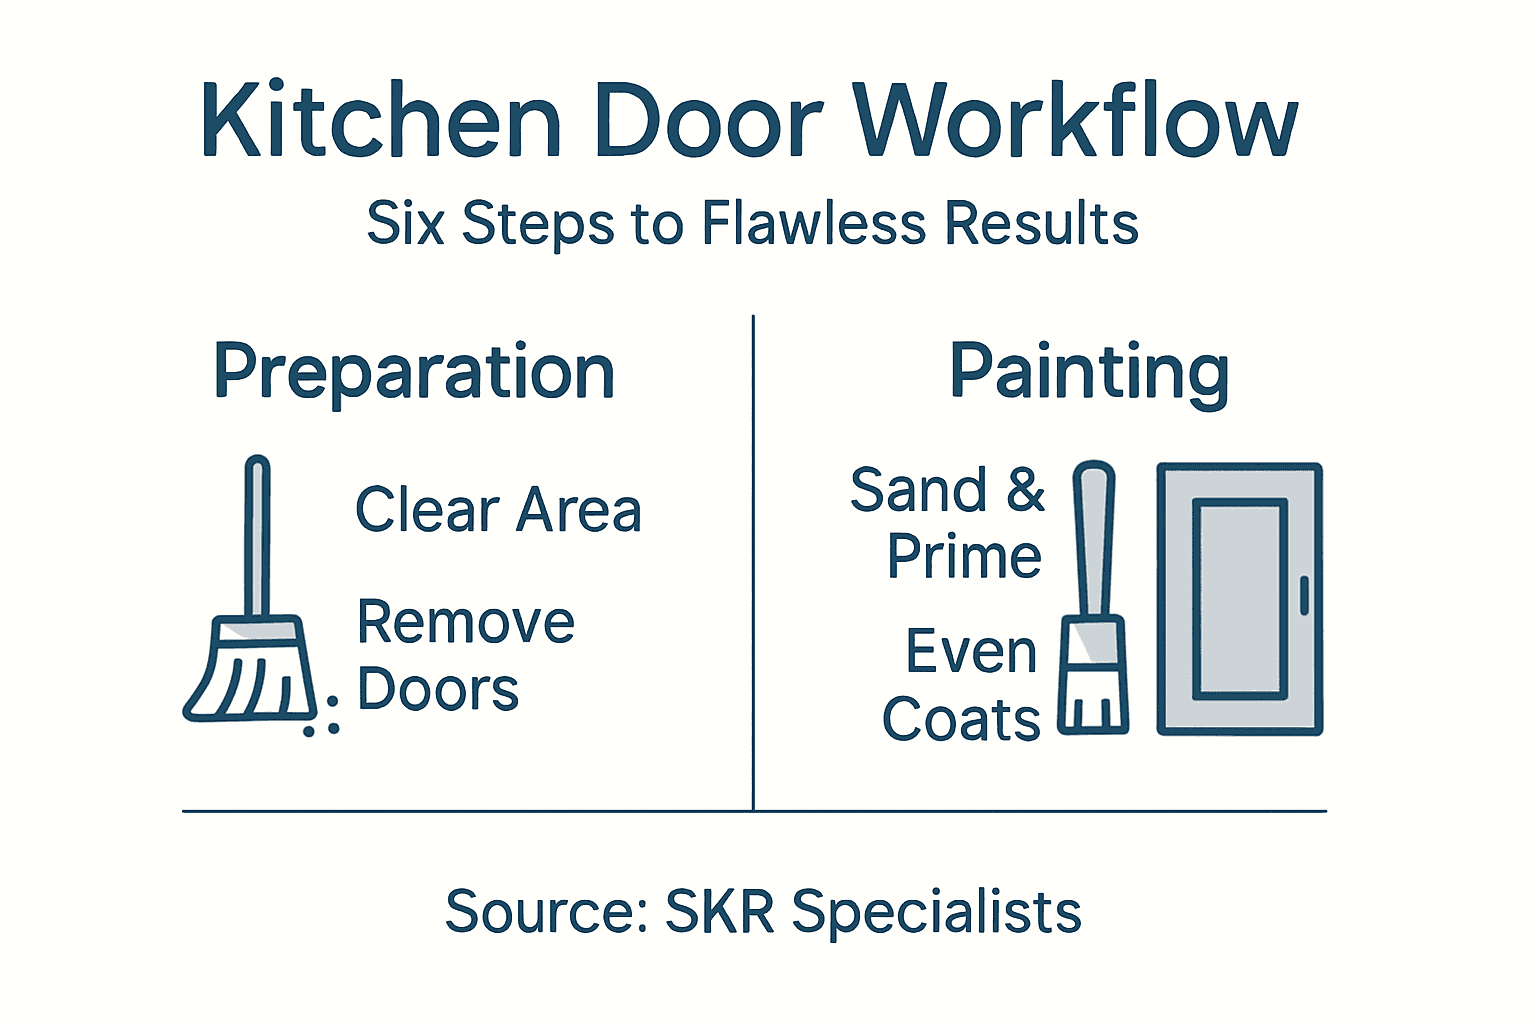
Kitchen Door Painting Workflow for Flawless Results
Preparing your kitchen for a respray can feel like a challenge when you want impressive results without risking mess or disruption in your home. Careful planning makes a huge difference, protecting your space and laying the groundwork for a flawless finish. By focusing on thorough preparation and food safety, you keep your renovation on track and ensure that your kitchen remains both stylish and safe throughout every stage of the project.
Table of Contents
- Step 1: Prepare The Kitchen For Safe Respraying
- Step 2: Remove And Clean Kitchen Doors Thoroughly
- Step 3: Mask Surrounding Areas And Fix Hardware
- Step 4: Sand And Prime Doors For Paint Adhesion
- Step 5: Apply Respray Paint Evenly To Doors
- Step 6: Inspect And Reinstall Doors For A Polished Finish
Quick Summary
| Key Point | Explanation |
|---|---|
| 1. Thoroughly Prepare Space | Clear out items and protect surfaces to prevent damage during respraying and ensure a safe working environment. |
| 2. Clean and Inspect Doors | Remove and deeply clean each door to ensure no grease or dust affects paint adhesion and finish quality. |
| 3. Use Proper Masking Techniques | Tape off surrounding areas and cover items to prevent paint overspray and ensure a professional look. |
| 4. Sand and Prime effectively | Lightly sand doors and apply primer to enhance paint adherence and create a durable surface for the new finish. |
| 5. Apply Paint Evenly | Use multiple thin layers of paint for a smooth finish, avoiding thick applications that can lead to runs and drips. |
Step 1: Prepare the kitchen for safe respraying
Before your kitchen respray begins, you need to prepare the space thoroughly. This means clearing out items, protecting surfaces, and ensuring the area is clean and safe for the painting process. Taking time here prevents damage to your belongings and creates an environment where the work can be completed to the highest standard.
Start by removing all food items, crockery, and utensils from the kitchen. Open your cupboards and drawers, then transfer everything to another room or secure storage. This step protects your items from paint particles and dust. Pay special attention to any appliances you can safely disconnect and move, such as toasters, kettles, or small gadgets that sit on worktops.
Next, clear your kitchen surfaces completely. Wipe down all countertops, shelves, and the inside of units to remove any dust or grease. Food safety during maintenance activities requires controlling dust and contaminants that could settle on food contact surfaces. Remove or cover any remaining fixed appliances like microwaves or integrated dishwashers with protective sheeting.
Ventilation matters enormously when respraying kitchen doors. Open windows fully and ensure air can circulate throughout the space. If you have an extractor fan, run it continuously during the work. This removes paint fumes and prevents them from settling elsewhere in your home. Poor ventilation can leave odours lingering for weeks and may cause health concerns for you and your family.
Protect your flooring with dust sheets or cardboard. Secure them properly so they don’t shift when people walk across them. Cover any built-in features, exposed electrics, or items you cannot move. Pay attention to hinges, handles, and any hardware on your doors that you want to keep clean. Minimising health risks during kitchen respraying involves protecting against overspray and ensuring proper containment of materials.
Pro tip: Remove cabinet doors completely before the spray team arrives if possible, as this gives them better access and produces superior results compared to spraying doors in place.
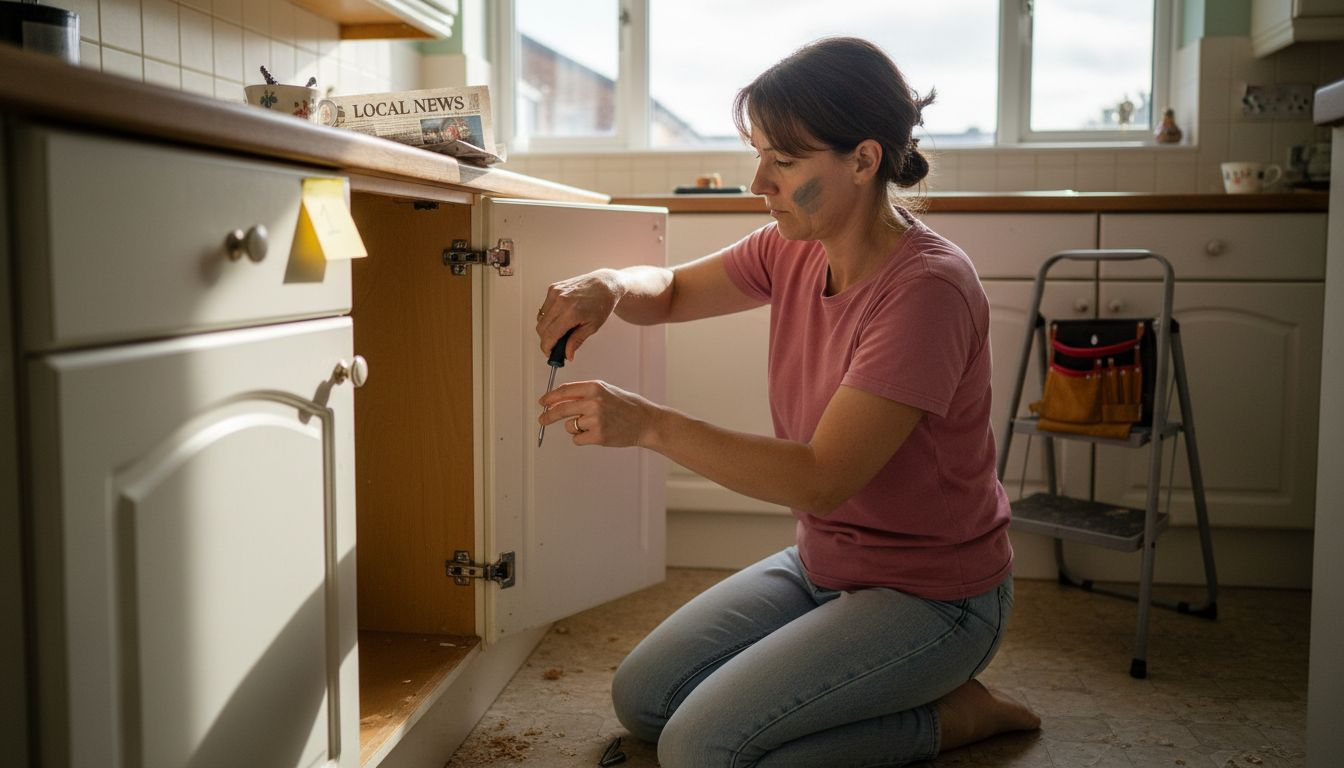
Step 2: Remove and clean kitchen doors thoroughly
With your kitchen prepared, you now need to remove your doors and give them a comprehensive clean. This step is crucial because any grease, dust, or grime left on the surface will affect how the new paint adheres and finish. Taking time here ensures a flawless final result.
Start by carefully removing each door from its hinges. Support the door fully as you lift it away to avoid damage. Remove all hardware including handles, hinges, and any decorative elements. Lay the doors flat on a clean, protected surface in another room or your garden. Working outside gives you better ventilation and keeps your kitchen tidy during the cleaning process.
Once removed, inspect each door closely for accumulated grime. Thorough cleaning protocols ensure doors are free from grease, dirt, and contaminants before any refinishing work. Use a damp cloth with warm soapy water to wipe down both sides thoroughly. Pay special attention to the edges, corners, and around where the handles were fitted. These areas often hide stubborn grease and dust.
For stubborn grease marks, a gentle degreaser works well on most kitchen door finishes. Apply it sparingly and wipe clean with a damp cloth immediately afterwards. Never use harsh abrasives that might scratch the existing finish. Once cleaned, dry each door completely with a soft cloth. Any remaining moisture can interfere with primer adhesion and paint application.
Let your doors air dry fully before moving them into storage. Standing them upright against a wall works well, but ensure they are stable and won’t topple. Good airflow helps speed up drying. Once completely dry, your doors are ready for the respray team to transform them with a fresh, professional finish.
Pro tip: Number and photograph each door before removal so you can easily identify which goes where during reinstallation, especially helpful in larger kitchens with multiple identical units.
Step 3: Mask surrounding areas and fix hardware
Now that your doors are clean and ready, you need to protect everything around them and secure any remaining hardware. Masking prevents paint overspray from landing on surfaces you want to keep pristine, whilst securing or removing hardware keeps both your belongings and the spray team safe during the work.
Start by identifying all surfaces near where your doors will be sprayed. This includes walls, door frames, adjacent cabinetry, and flooring. Use painter’s tape to create clean lines and protect these areas. Apply the tape carefully, pressing it down firmly so paint cannot seep underneath. Quality painter’s tape makes a real difference in achieving crisp edges and preventing costly mistakes.
Masking non-target areas protects surfaces from paint overspray and ensures a professional finish. Cover large areas like walls with plastic sheeting secured with tape. Pay particular attention to light switches, electrical outlets, and any built-in features that cannot be removed. Nothing ruins a freshly painted kitchen faster than discovering paint splatter on surfaces you thought were protected.
For hardware still attached to your doors, you have two options. If hinges or handles remain, mask them carefully with tape and plastic wrap. This protects them from paint but requires more precision work. Alternatively, securing hardware safely means removing any remaining components before spraying begins. Most spray teams prefer doors completely bare, so discuss this with yours beforehand. Removed hardware should be stored safely in a labelled container so nothing gets lost.
Check your masking one final time before work begins. Walk around your kitchen and look for gaps where paint might escape. Run your hand along tape edges to ensure they are sealed tight. Proper masking takes thirty minutes but saves hours of cleanup and prevents damage that could ruin your renovation investment.
Pro tip: Use low tack painter’s tape rather than standard masking tape, as it removes cleanly without damaging wall paint or leaving sticky residue behind.
Step 4: Sand and prime doors for paint adhesion
Sanding and priming are the crucial steps that transform your doors from old surfaces into something ready for flawless paint application. These processes work together to ensure your new finish bonds properly and lasts for years without peeling or chipping. Skip them and you risk disappointment later.
Begin by sanding each door with medium grit sandpaper. Work systematically across both sides, following the wood grain where possible. Your goal is to roughen the surface slightly and remove any glossy coating that might prevent paint adhesion. Pay extra attention to edges and corners where old paint may be thicker. You do not need to sand down to bare wood unless there is significant damage or old paint buildup. A light scuff is often sufficient on well maintained doors.
Sanding removes old coatings and smooths surfaces for paint adhesion. Once sanded, wipe each door thoroughly with a damp cloth to remove all dust. This step matters more than most people realise. Dust left on the surface creates a barrier between primer and the door, causing adhesion problems later. Allow doors to dry completely before moving to priming.
Priming is where the magic happens. Applying primer improves paint adhesion and protects the undercoat, creating a sealed base that extends paint longevity. Use a quality primer suitable for your door material. Apply it evenly with a brush or roller, maintaining a wet edge to avoid lap marks. One coat of primer is usually sufficient, though badly stained or knotty doors may benefit from two coats. Allow primer to cure fully before the spray team arrives, as this ensures optimal paint bonding.
Your doors are now properly prepared. They are smooth, sealed, and ready for professional respraying to deliver that stunning kitchen transformation you are after.
Use this reference table for materials and tools recommended at each kitchen respray stage:
| Step | Recommended Tool or Material | Purpose |
|---|---|---|
| Kitchen prep | Dust sheets, cardboard, tape | Protect flooring/surfaces |
| Door removal & cleaning | Screwdriver, mild detergent, cloth | Remove hardware, clean |
| Masking | Low-tack painter’s tape, sheeting | Prevent overspray |
| Sanding & priming | Medium grit sandpaper, tack cloth | Smooth and prepare doors |
| Painting | Calibrated spray gun, primer, paint | Achieve even coverage |
Pro tip: Invest in a tack cloth after sanding to capture fine dust particles that ordinary cloths miss, ensuring a perfectly clean surface for primer application.
Step 5: Apply respray paint evenly to doors
This is where your kitchen transformation truly comes to life. Applying paint evenly across your doors requires technique, patience, and attention to detail. The difference between a professional finish and a disappointing one often comes down to how carefully this step is executed.
Start by understanding that thin, even coats beat thick, heavy applications every time. Applying multiple thin layers prevents runs and drips whilst ensuring a flawless texture. Plan to apply at least two coats, allowing adequate drying time between each one. Rushing through this step or trying to cover everything in one thick coat will result in sagging paint, uneven colour, and a disappointing finish.
Before you begin spraying, ensure your environment is right. Temperature, humidity, and air circulation all affect how paint flows and dries. Avoid painting in direct sunlight or extremely cold conditions. Ventilate the space properly so paint fumes escape and moisture can evaporate evenly. If using spray equipment yourself, check that your spray gun is properly calibrated for consistent coverage and pressure.
Apply paint using smooth, overlapping passes across the door surface. Move at a steady pace, maintaining consistent distance between the nozzle and the door. Work systematically from top to bottom, ensuring edges and corners receive adequate coverage. Even application requires proper technique and environmental controls to achieve uniform colour consistency. Allow each coat to dry completely before applying the next one, as this prevents blending and ensures proper adhesion.
Watch for drips or runs as you work, and address them immediately with a brush before they dry. Once your final coat is applied, resist the temptation to touch or move the doors. Let them cure fully in a dust free environment. This patience at the end delivers the stunning, professional finish you have been working towards.
Pro tip: Maintain consistent spray gun distance and speed by moving only your arm at the elbow, keeping your shoulder still, which produces far more uniform coverage than moving your whole body.
Step 6: Inspect and reinstall doors for a polished finish
Your doors are painted and cured. Now comes the satisfying final step of inspecting your work and putting everything back together. This is where your kitchen transformation becomes complete and functional again. Take time here to ensure everything meets your standards.
Begin by inspecting each door carefully under good lighting. Look for any imperfections, missed spots, or blemishes in the finish. Final inspection checks for imperfections and finish quality before reinstalling. Minor dust particles trapped in the paint can be gently sanded with very fine grit paper and touched up if needed. Stand back and view each door from different angles and distances to ensure colour consistency and an even finish across all surfaces.
Once you are satisfied with the paint work, clean each door thoroughly with a soft, dry cloth to remove any remaining dust or debris. This simple step prevents particles from getting trapped when doors are reinstalled. Check that your stored hardware is clean and ready to reattach. Inspect hinges, handles, and any other components for damage or corrosion. If hinges are stiff, a light application of lubricant helps them operate smoothly.
Begin reinstalling doors by first reattaching hardware in the correct positions. Reference your photographs from the removal step to ensure handles and hinges go back in their original locations. Use the appropriate fasteners and tighten them securely but do not over-tighten, as this can strip threads or crack components. Once hardware is fitted, rehang each door on its hinges, checking that it aligns properly with the frame and adjacent doors.
Test each door carefully, opening and closing it smoothly through its full range of motion. Doors should hang evenly without gaps or binding. Adjust hinges if necessary to achieve perfect alignment. Your kitchen now displays fresh, professionally finished doors that will transform the entire space.
Here’s a summary of common kitchen respray challenges and how to avoid them:
| Challenge | Cause | Prevention Tip | Impact on Finish |
|---|---|---|---|
| Dust contamination | Inadequate cleaning or masking | Deep clean and mask properly | Uneven, gritty surface |
| Paint runs and drips | Thick paint layers or poor technique | Apply thin, even coats | Streaks and blemishes |
| Poor paint adhesion | Skipped sanding or priming | Sand and prime all surfaces | Peeling over time |
| Lingering paint fumes | Insufficient ventilation | Open windows, run extractor | Odours and health risks |
| Misaligned doors | Incorrect reinstallation | Photograph, number doors | Gaps and poor alignment |
Pro tip: Take photographs of each door from multiple angles before you begin work, then compare your finished doors to these images to spot any imperfections you might have missed.
Achieve Flawless Kitchen Door Resprays with Professional Expertise
Struggling with common kitchen respray challenges like dust contamination, poor paint adhesion or misaligned doors? Our insights in the Uncategorized Archives – WordPress help you understand why proper sanding, priming, masking and expert spraying matter to get that perfect finish. However, for a truly stress-free kitchen transformation with guaranteed quality and minimal disruption, trust the professionals.

At SKR Specialists, we specialise in in-situ kitchen resprays that focus on precision, safety and longevity. Avoid the hassle of trial and error and benefit from a fully prepared, dust free environment with expertly applied paint that lasts. Take the next step towards a stunning kitchen upgrade by exploring how we can bring your respray project to flawless completion now.
Frequently Asked Questions
How do I prepare my kitchen before painting the doors?
Before painting your kitchen doors, clear out all items, including food, crockery, and utensils, to protect them from paint particles. Ensure thorough cleaning by wiping down surfaces to eliminate any dust or grease, which helps create a safe environment for the painting process.
What steps should I follow to clean and remove the kitchen doors?
Carefully remove each door from its hinges and take off all hardware. Clean both sides of the doors thoroughly with warm, soapy water, focusing on edges and corners, and dry them completely to ensure the best paint adhesion.
Why is sanding important for kitchen door painting?
Sanding is crucial because it roughens the door surface, allowing the new paint to adhere properly. Sand lightly with medium grit sandpaper across both sides before wiping them down with a damp cloth to remove all dust, ensuring a smooth finish.
How can I ensure even paint application on kitchen doors?
To achieve an even paint application, use thin layers of paint rather than thick coats. Apply at least two coats, allowing adequate drying time between each, and maintain a consistent distance between the spray nozzle and the door for uniform coverage.
What should I do after painting the kitchen doors before reinstallation?
After painting and curing your kitchen doors, inspect them under good lighting for any imperfections or missed spots. Clean the doors with a soft cloth to remove dust, check that all hardware is ready to attach, and align the doors correctly when reinstalling them to ensure a polished finish.